Set Up a VPN Connection on macOS
Setting up a VPN connection on macOS takes just a few steps.
1. Get your VPN credentials
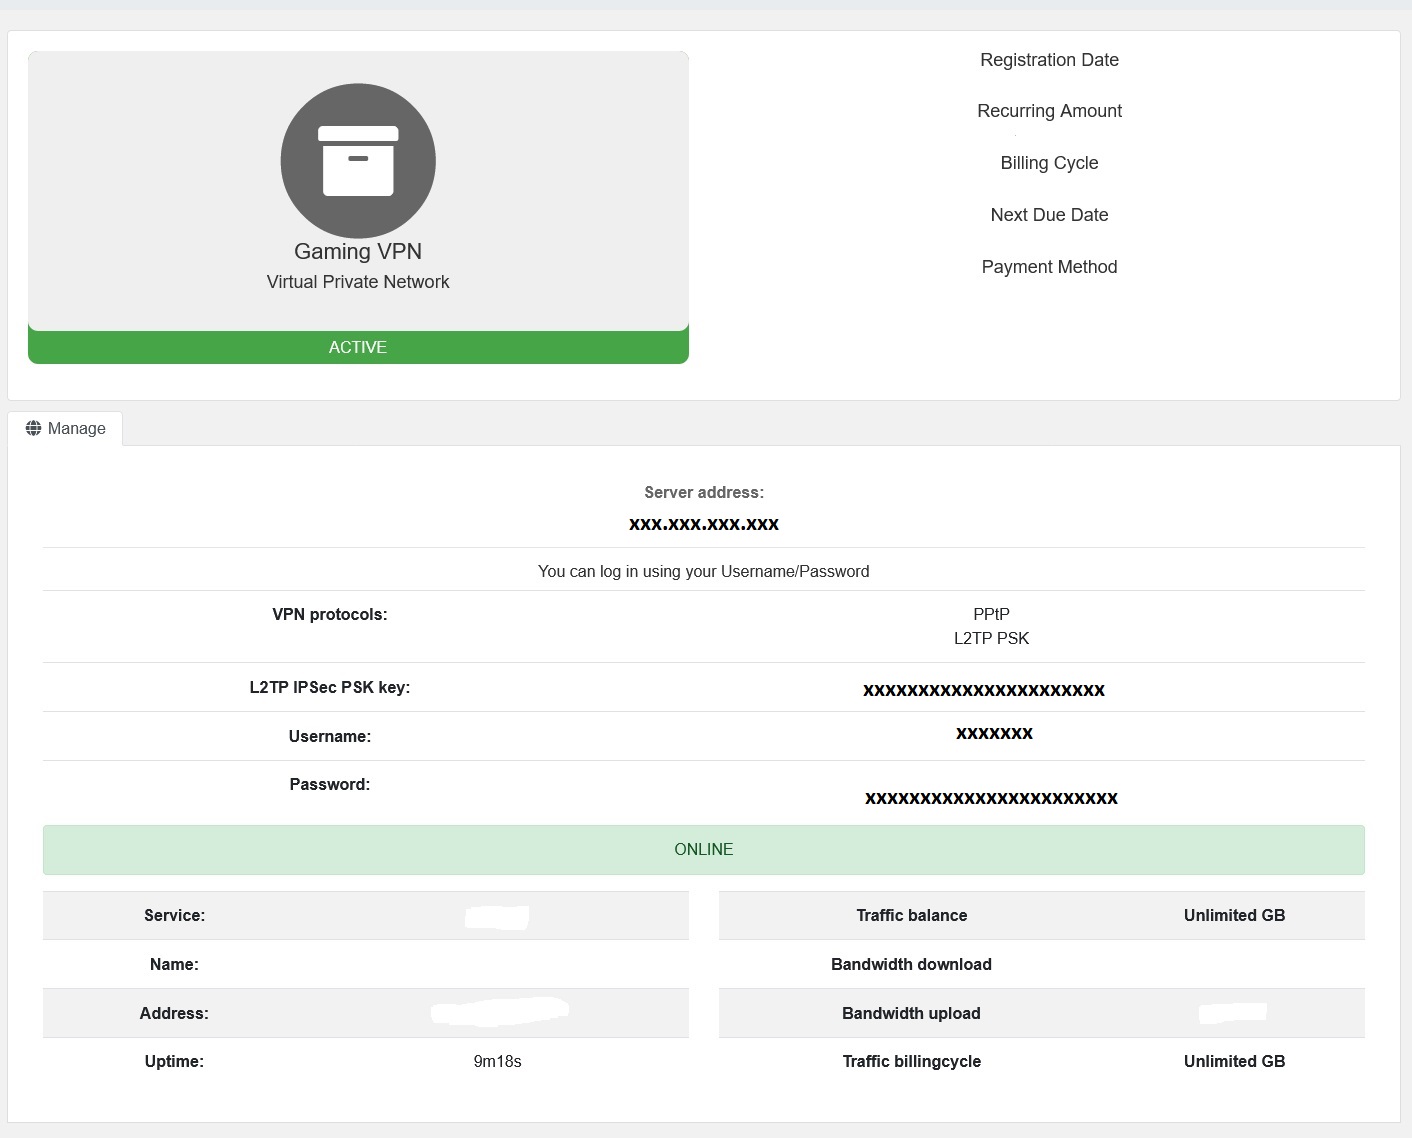
Log in to your account on our website and open your VPN service to see your username, password, server address, and the PSK key.
2. Create the VPN connection
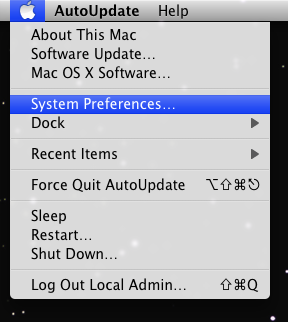
- Click the Apple menu → System Preferences.
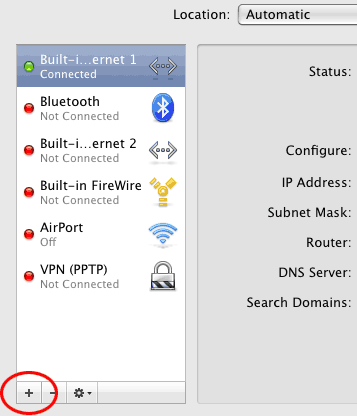
- Open Network, then click the + in the lower-left (you'll need administrator rights).
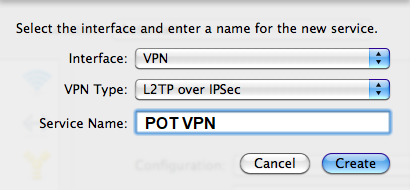
- Set Interface to VPN, VPN Type to L2TP over IPSec, give it a Service Name (e.g. POT VPN), and click Create.
3. Enter the connection details
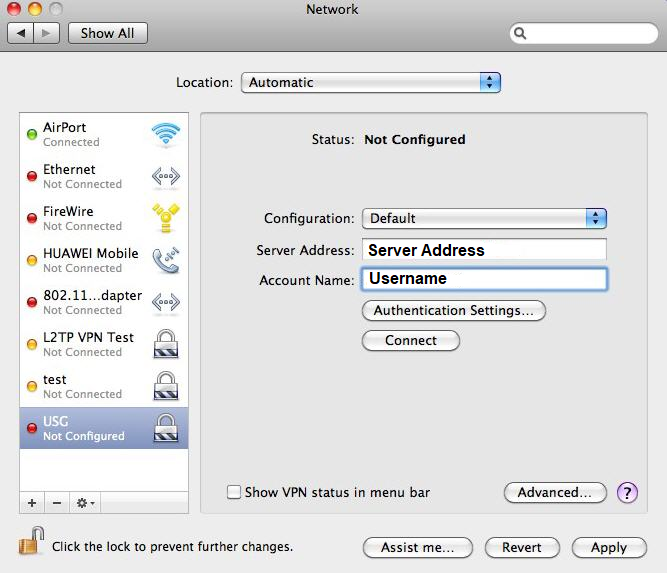
- Server Address: your server address from Step 1
- Account Name: your POT VPN username from Step 1
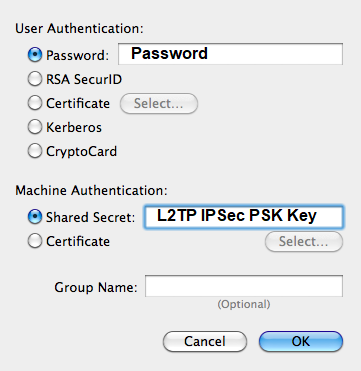
- Click Authentication Settings and enter your Password and Secret (the L2TP IPSec PSK key) from Step 1. Click OK, then Apply.
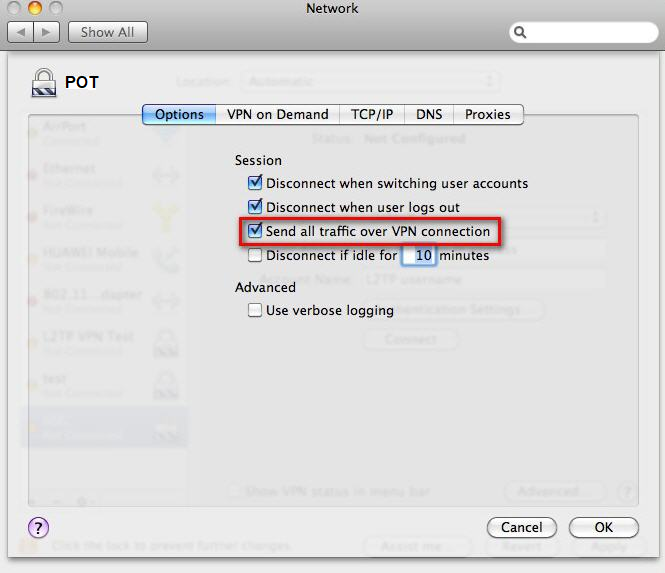
- Click Advanced and tick Send all traffic over VPN connection (off by default). Click OK, then Apply.
4. Connect
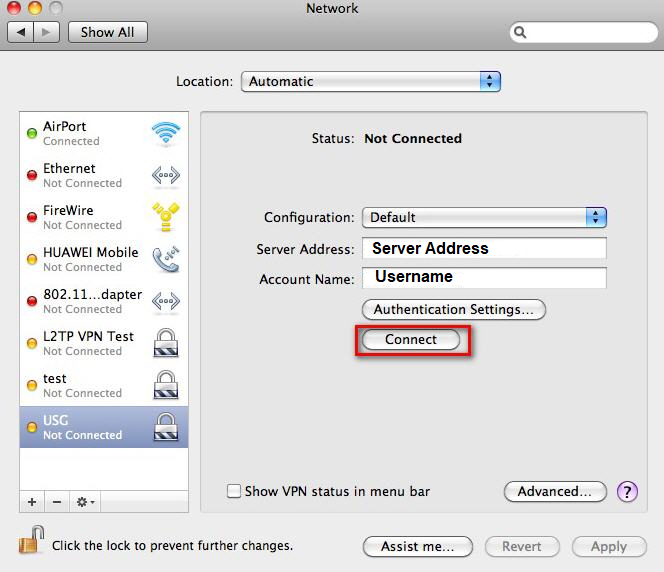
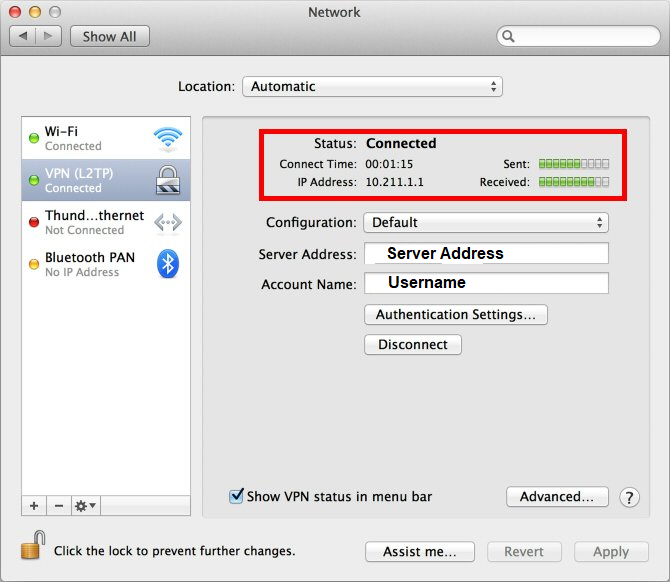
Click Connect. When the tunnel is up, the Status line shows Connected.