
Set Up a VPN Connection on Windows 11
Setting up a VPN connection on Windows 11 takes just a few steps.
1. Get your VPN credentials
Log in to your account on our website and open your VPN service to see your username, password, server address, and (for L2TP) the PSK key.
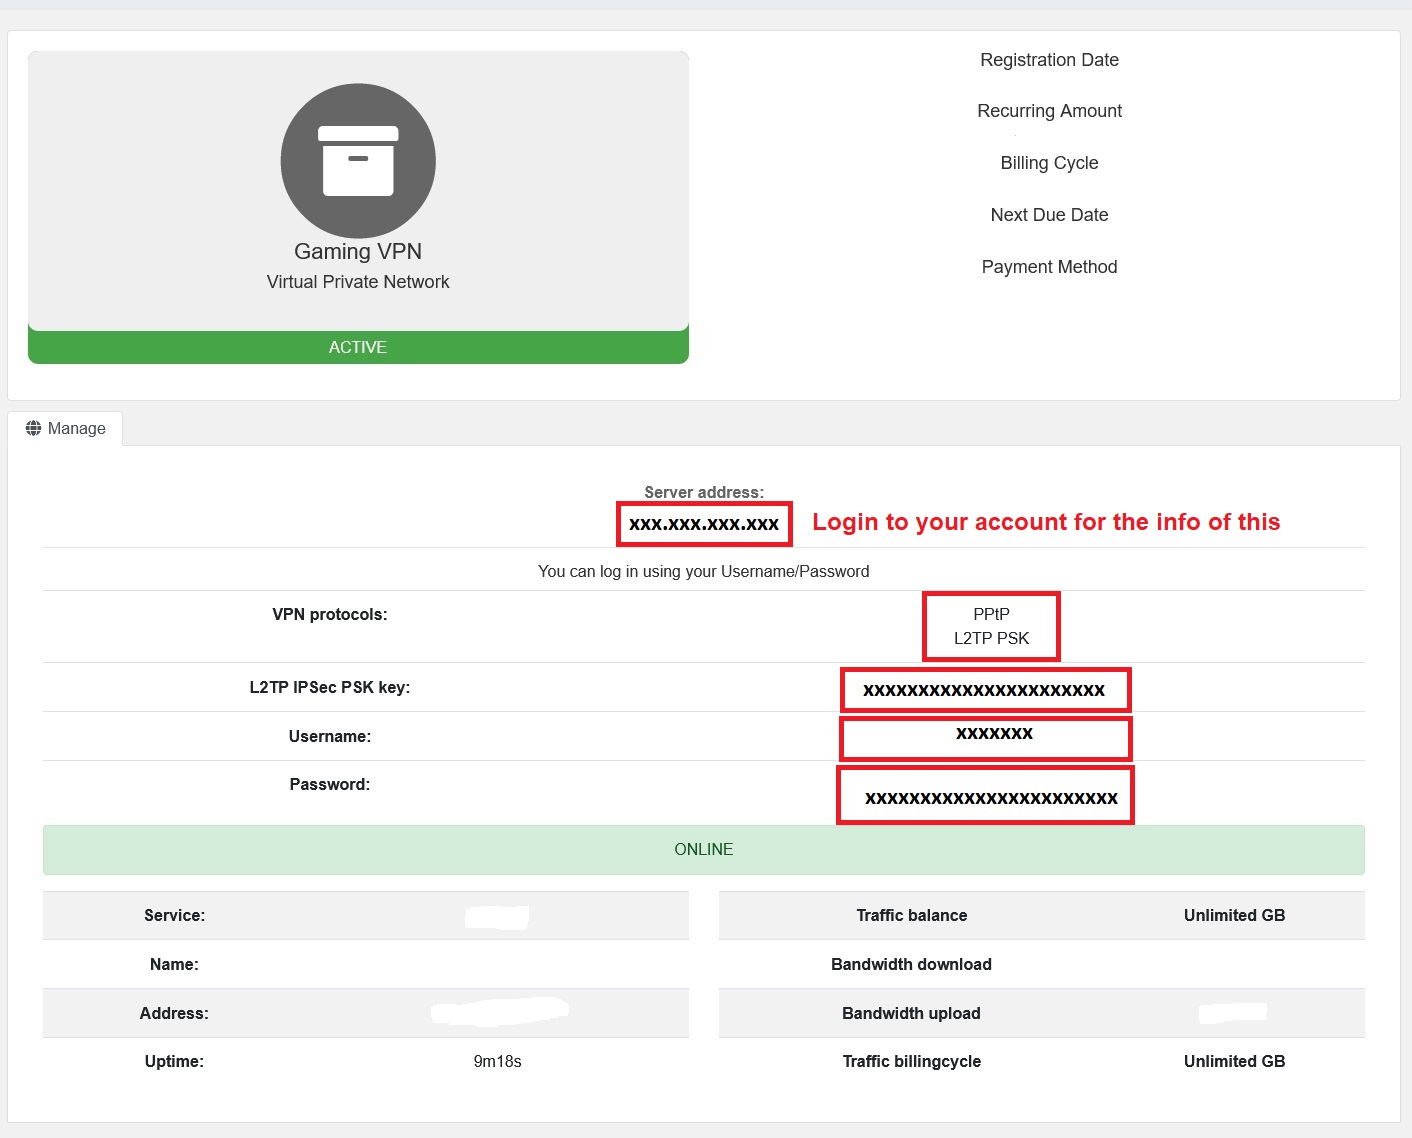
2. Add the VPN
- Go to Start → Settings → Network & internet → VPN.
- Click Add VPN.
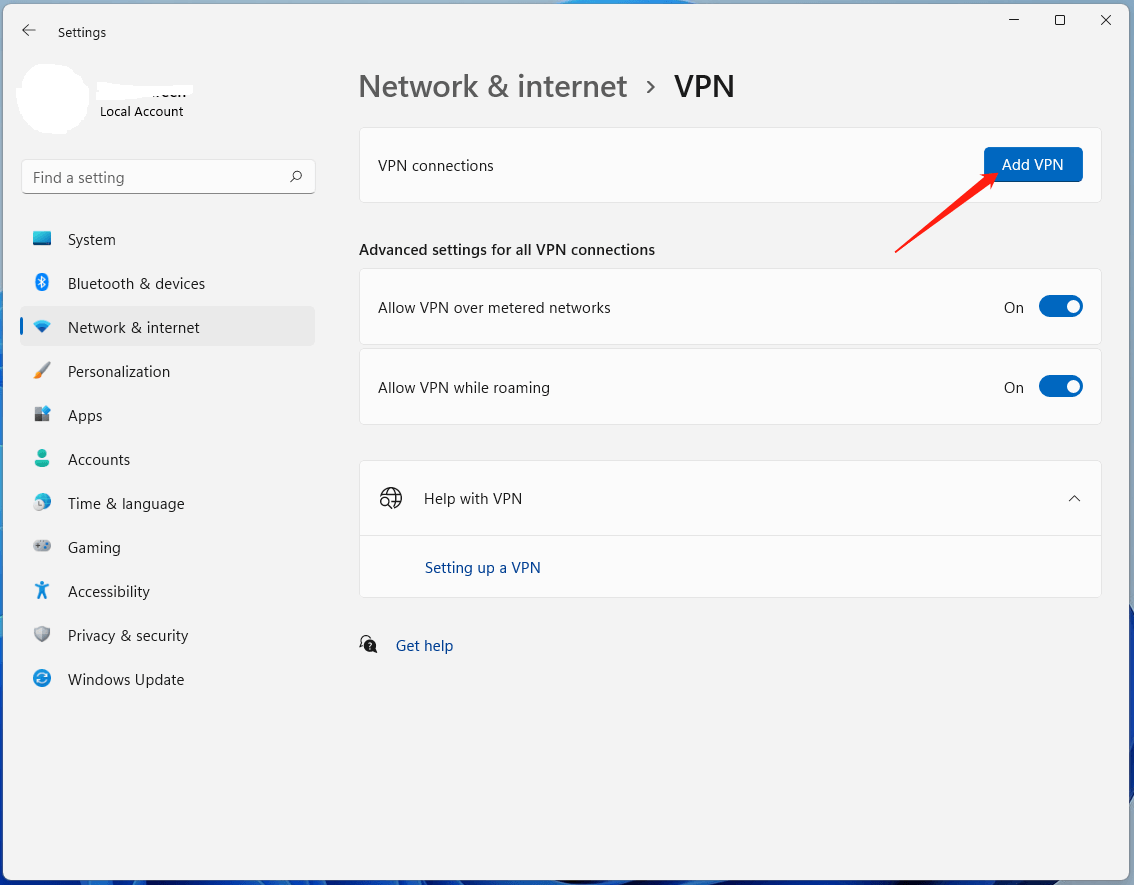
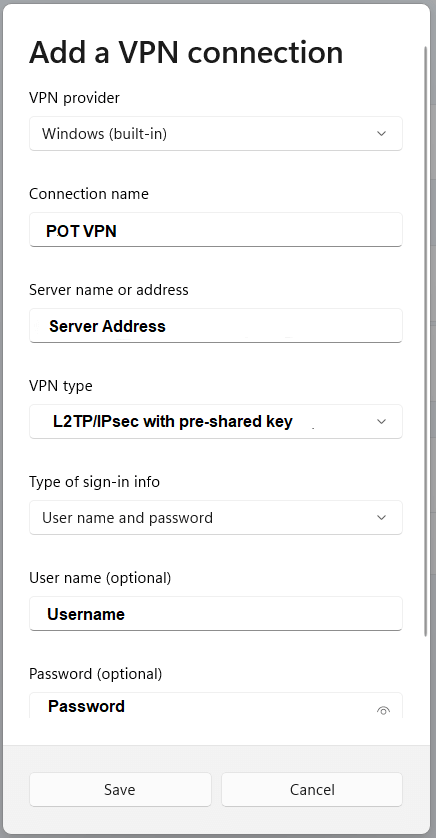
3. Enter your connection settings
- VPN provider: Windows (built-in)
- Connection name: anything you like (e.g. POT VPN)
- Server name or address: your server address from Step 1
- VPN type: Automatic (or L2TP/IPsec with pre-shared key)
- Type of sign-in info: User name and password
- User name / Password: your POT VPN username and password from Step 1
Click Save.
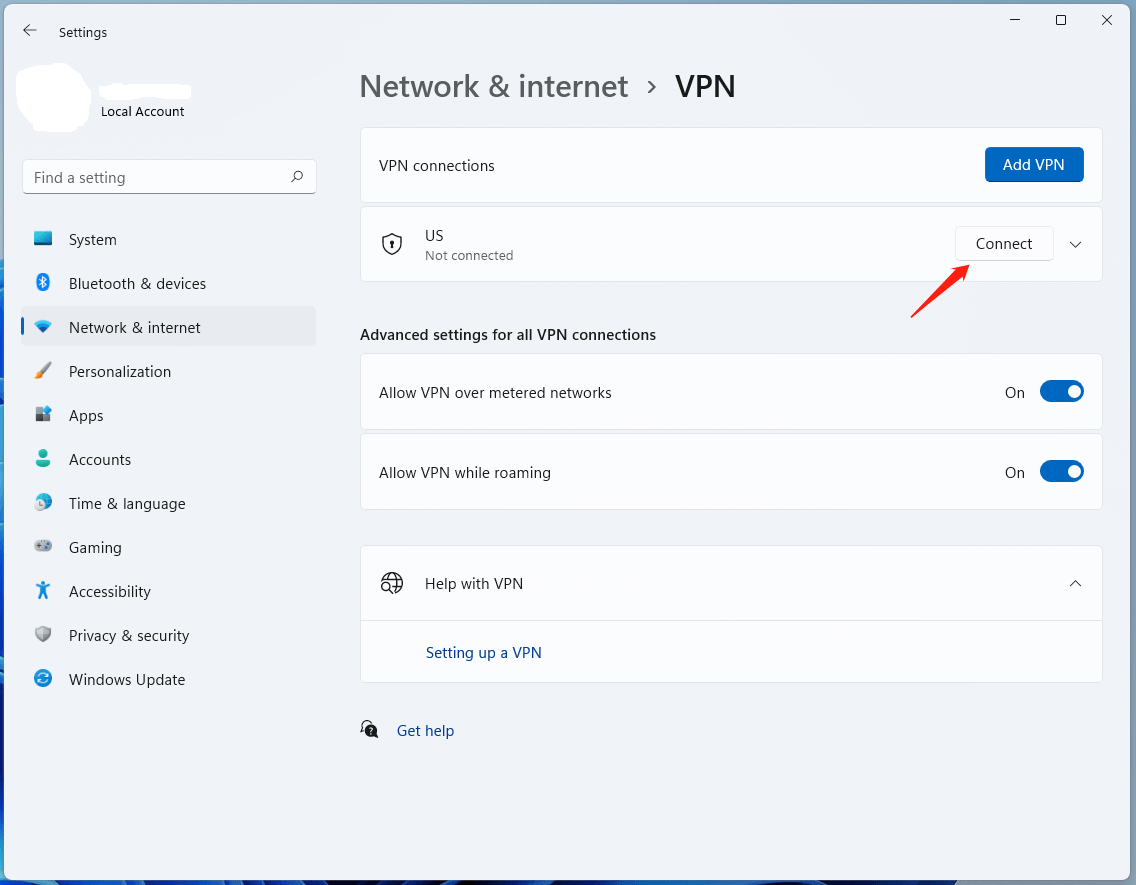
4. Connect
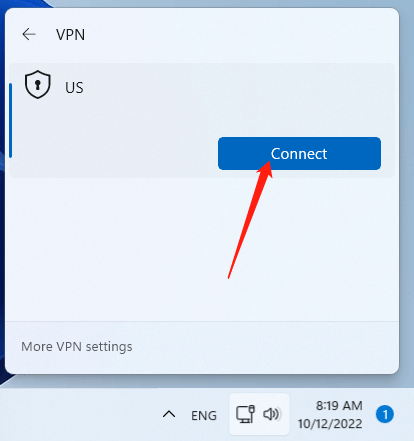
Your VPN now appears under VPN connections. Click Connect — or click the network icon on the taskbar, select VPN, choose your connection, and click Connect.
Good to know: we recommend the L2TP protocol for its stronger encryption. Our VPN is built for low latency, so there's no benefit to leaving it on all the time — disconnect when you're done and use your normal internet as usual.
(Optional) Confirm the VPN routes through our network
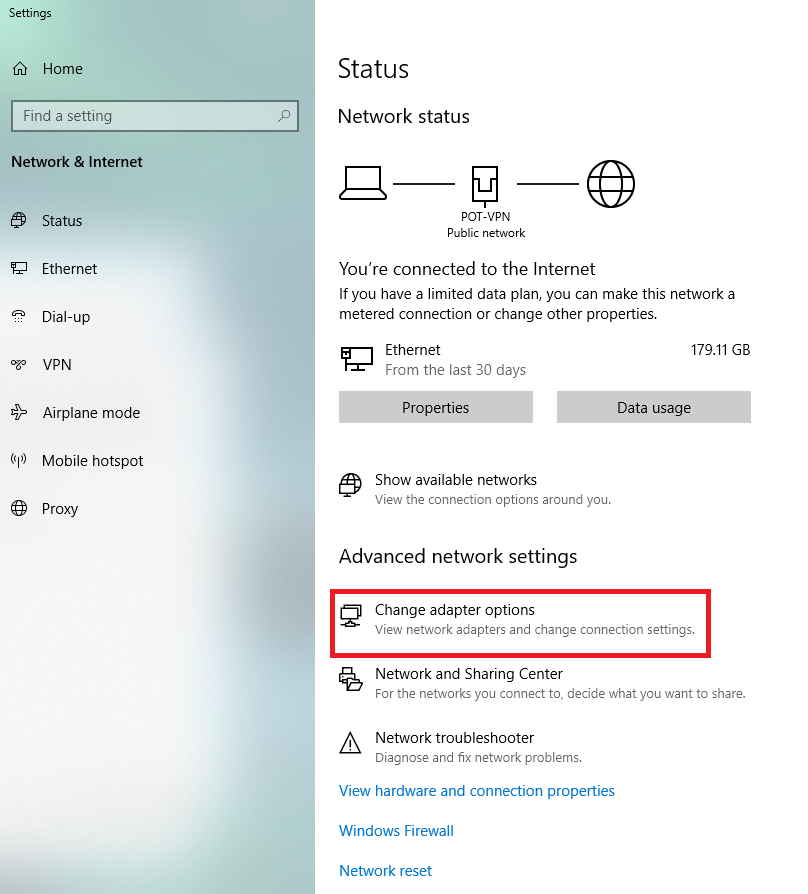
- Back in Windows VPN settings, click Change adapter options.
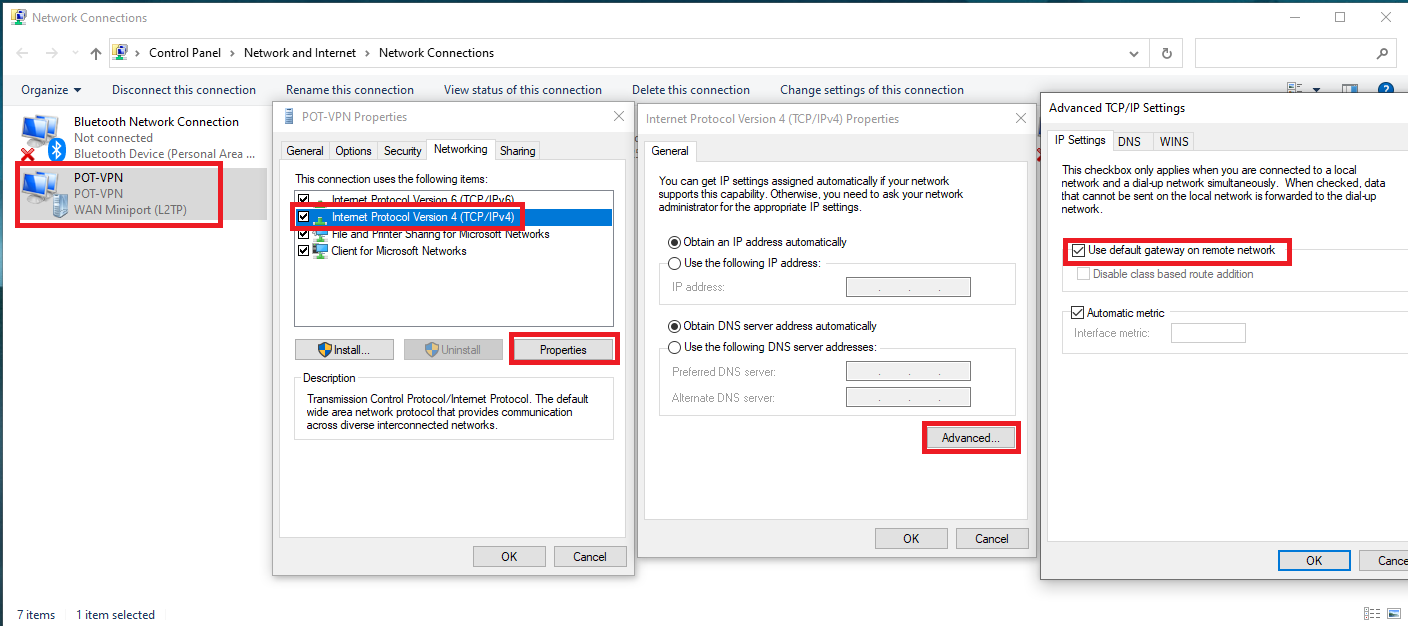
- Right-click your VPN connection and choose Properties.
- On the Networking tab, select Internet Protocol Version 4 (TCP/IPv4) and click Properties.
- Under Advanced → IP Settings, make sure Use default gateway on remote network is ticked, then click OK.
Your traffic is now routed through our network.