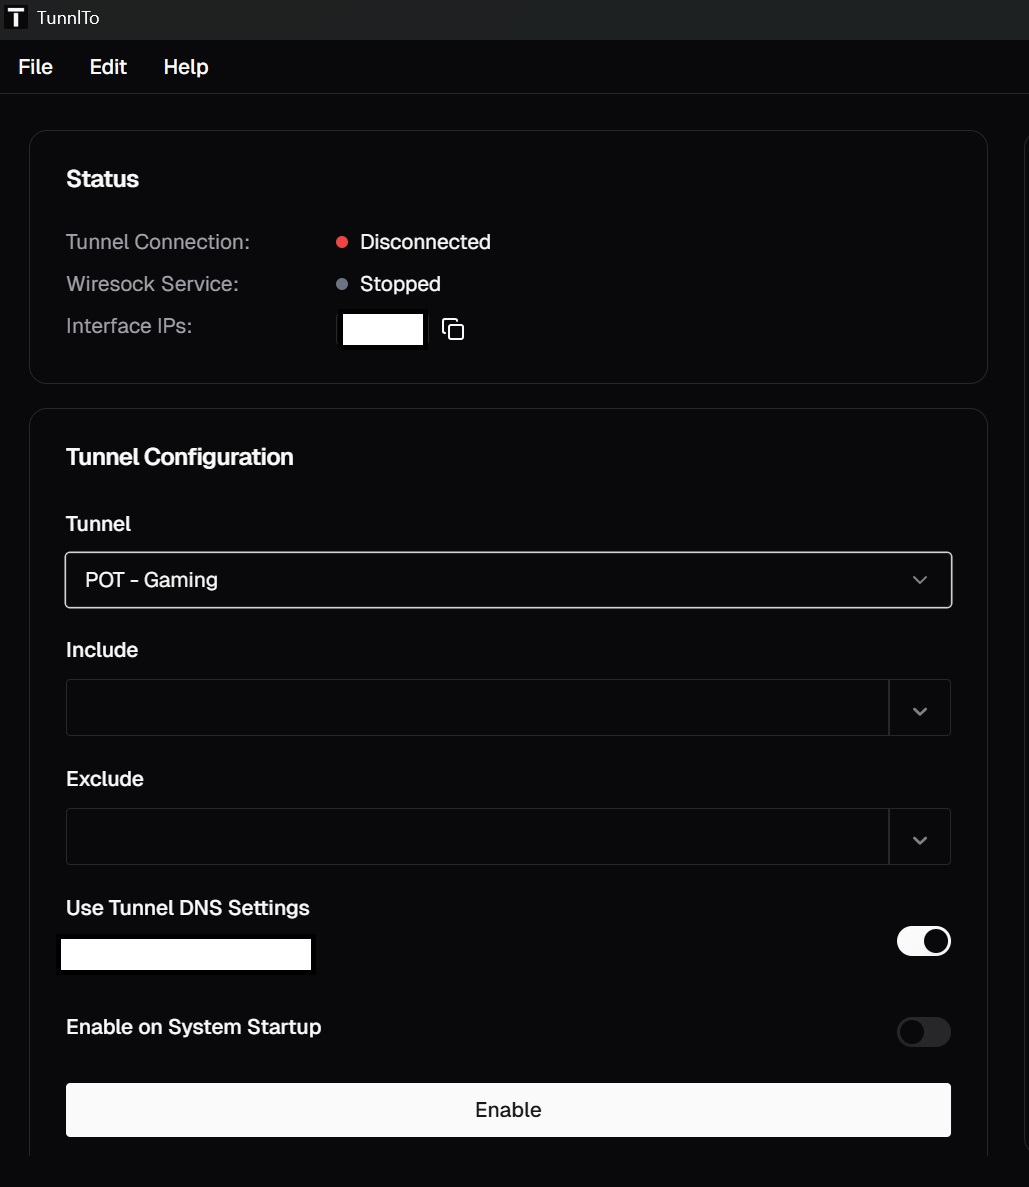
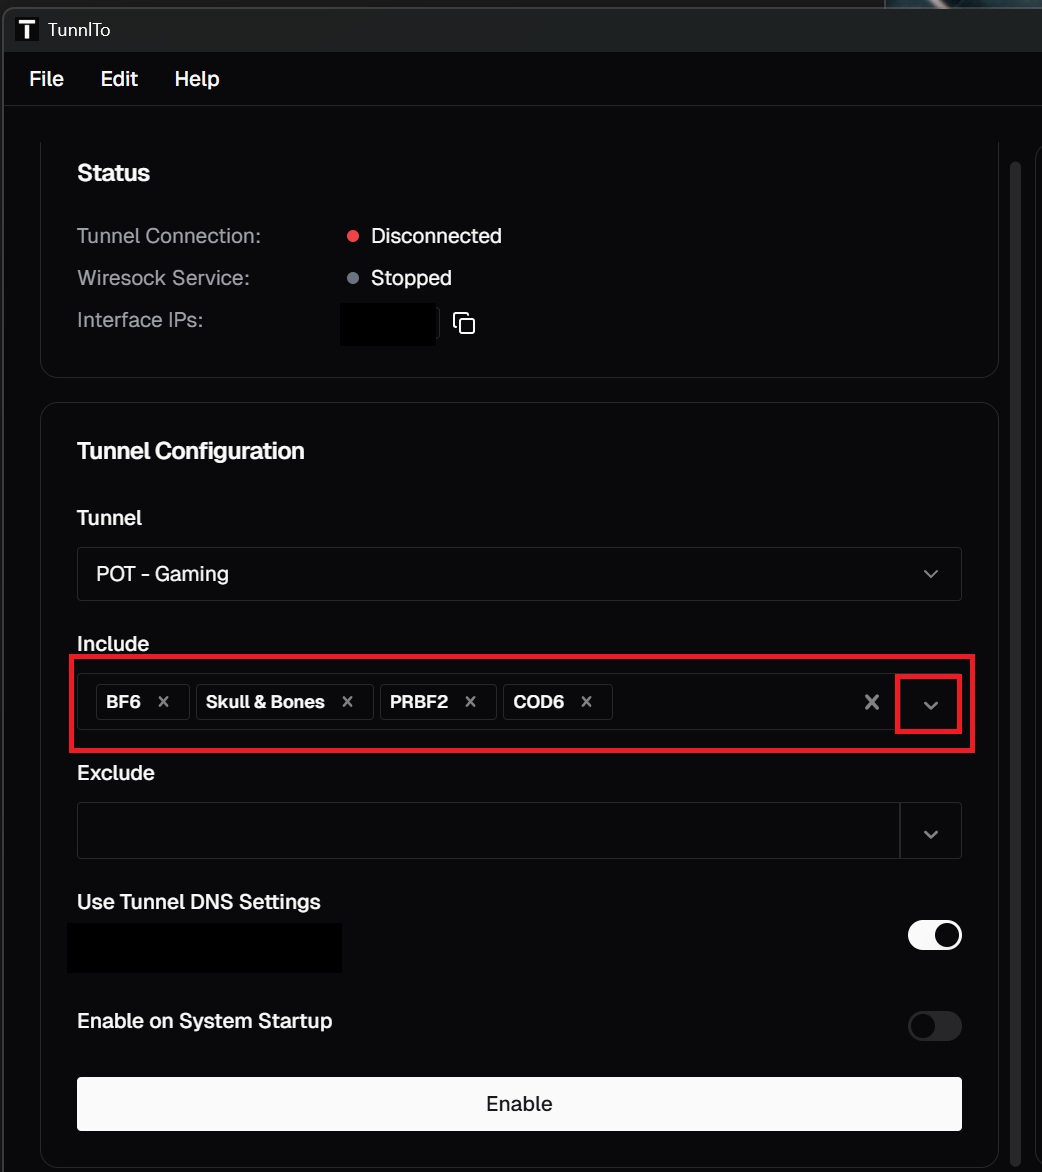
The magic of split tunneling begins here, as activating the VPN with default setting would leads you to let all your PC traffic goes through the VPN while in most cases you need only specific Apps/Games goes through the VPN while the others are not.
In this case we are going to apply the following:
Battlefield 6 game goes through the VPN while all other apps and activities goes through your normal PC internet connection (Splitting the Connection)
Following steps is how to customize your split tunneling rule not how to install the VPN. For VPN installation Step by Step process Click Here
1- This Scenario means all your traffic will go through VPN when nothing is in the include section
2- Click on File --> New Rule
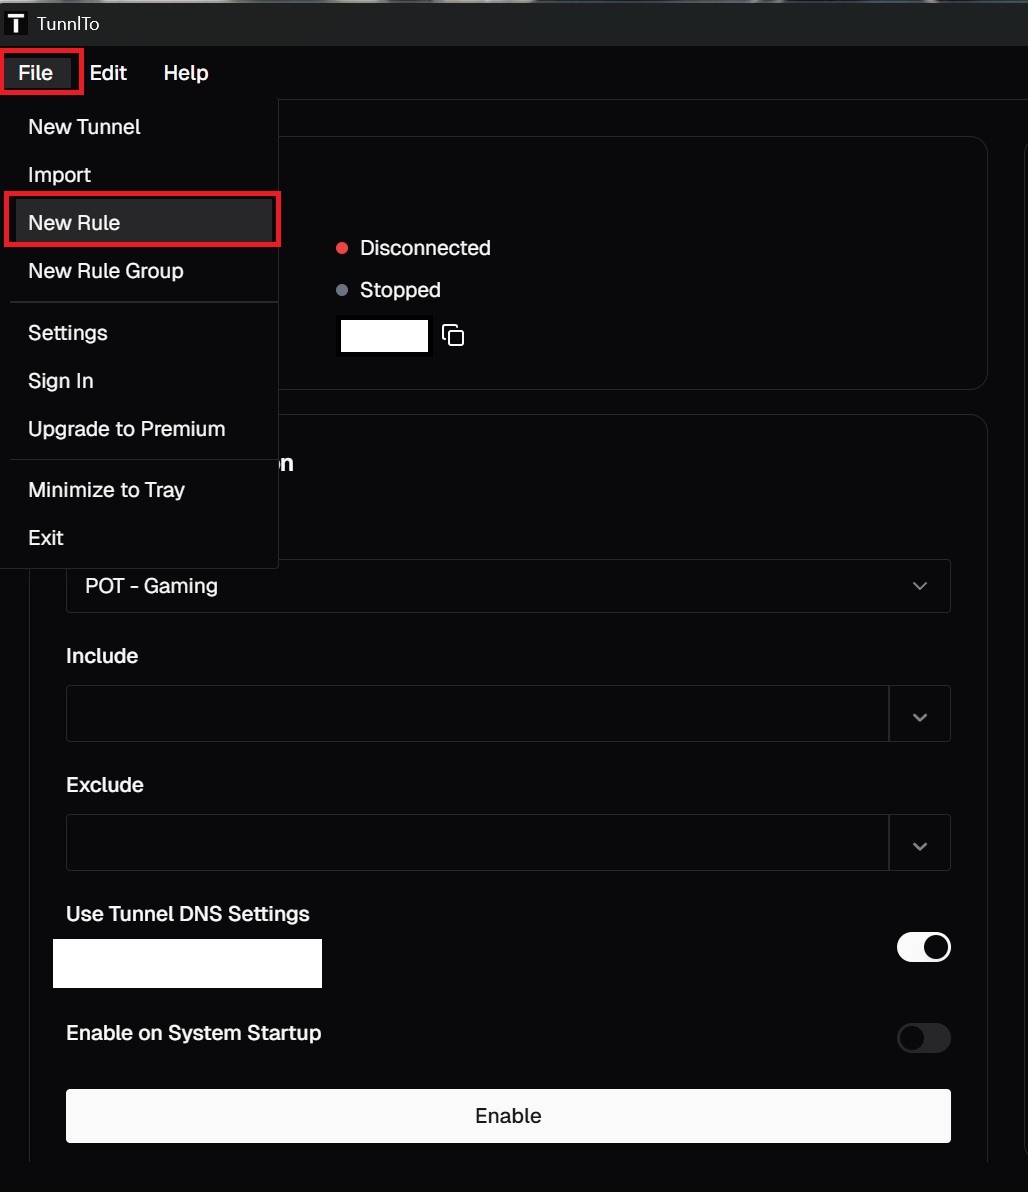
3- Add the following game info (Battlefield 6 Scenario)
Name: Any name (Identifier)
Type: Select "Process Name"
Value: bf6.exe
Create
4- In the Tunnel Configuration section:
Tunnel: The Tunnel Name you applied during the Installation
Include: Select BF6 (Identifier)
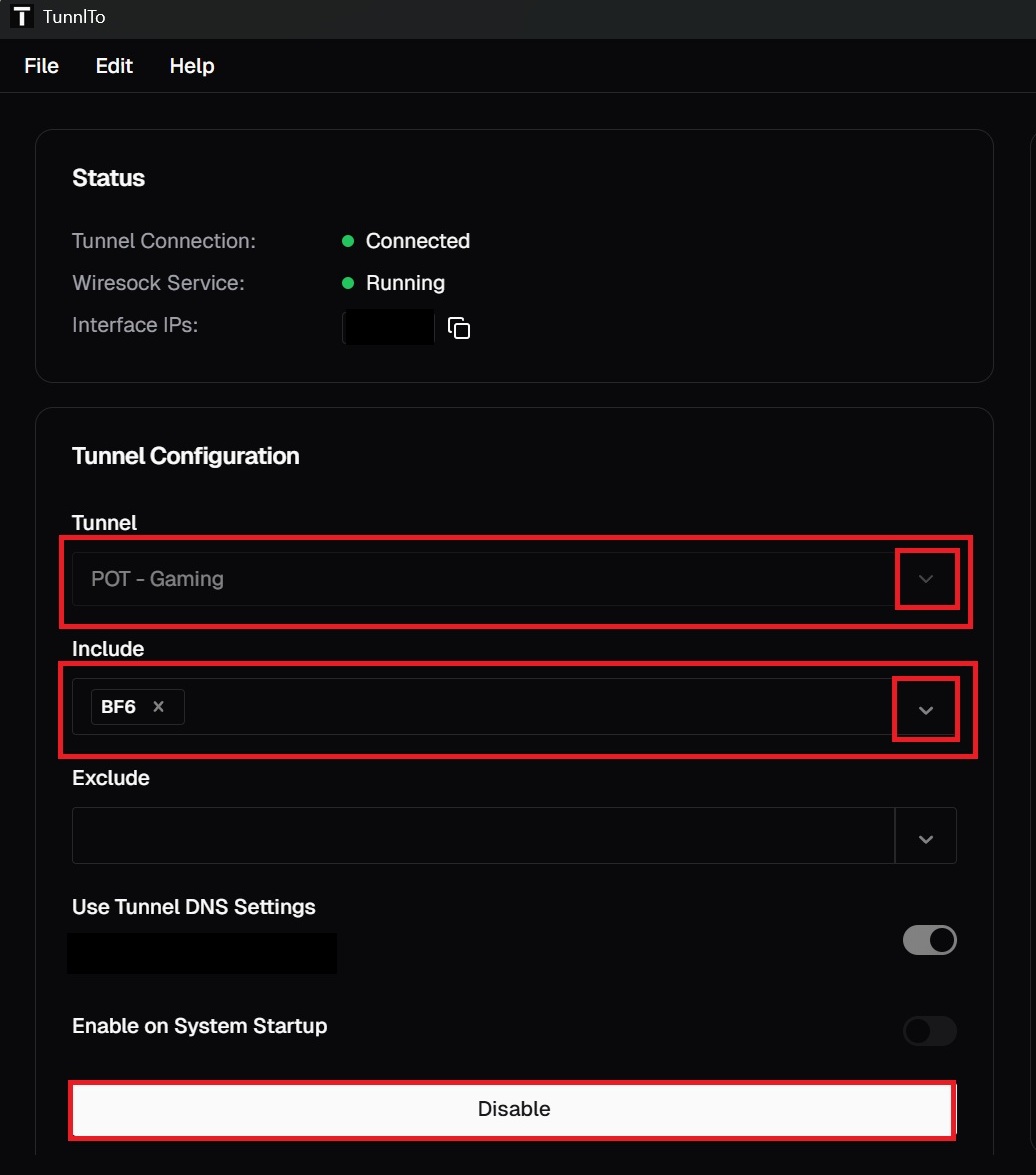
6- You can apply as many rules as you can for multiple Games and/or Apps
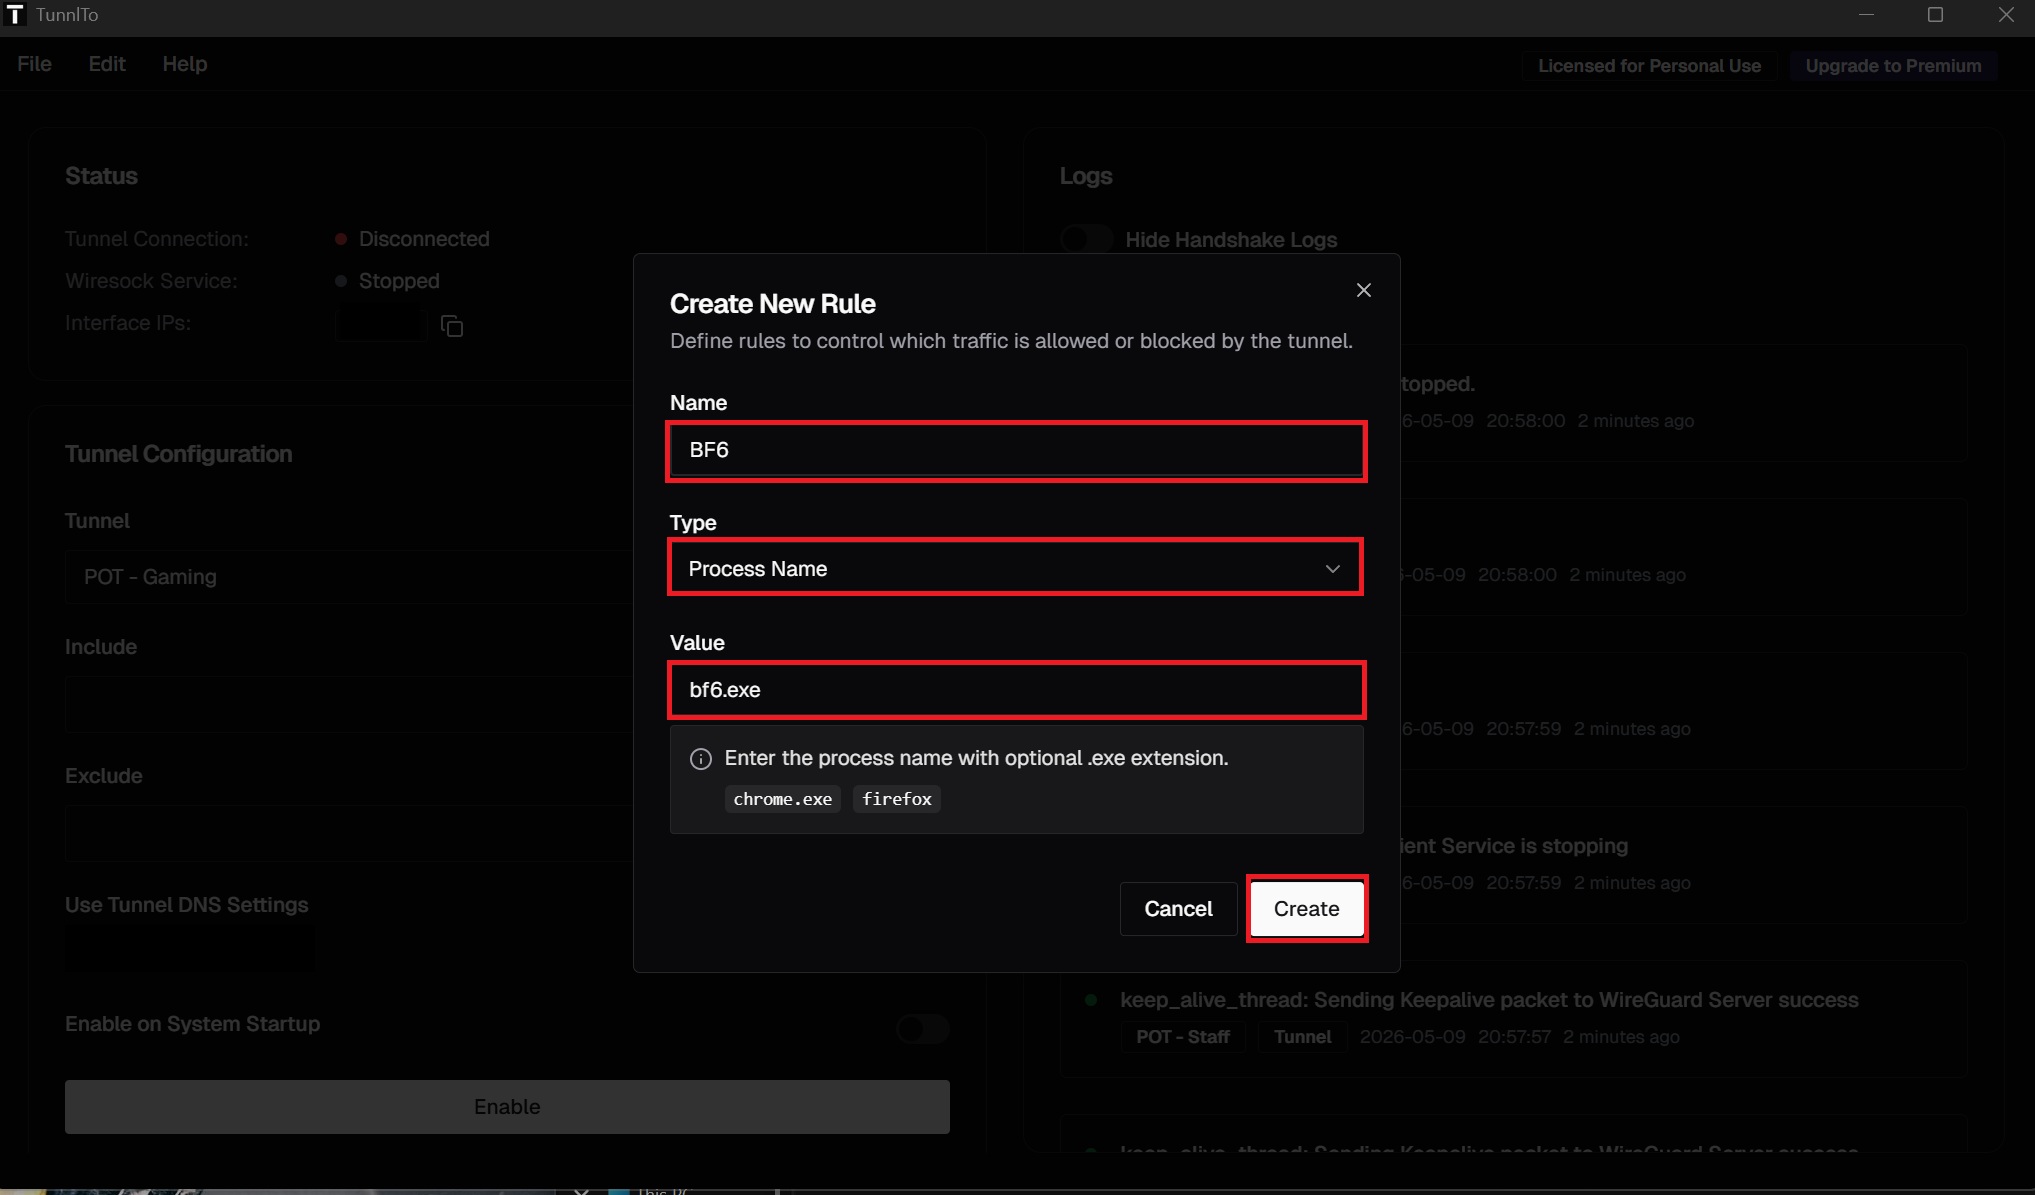
How to get the Game / App Value to be added in the rule
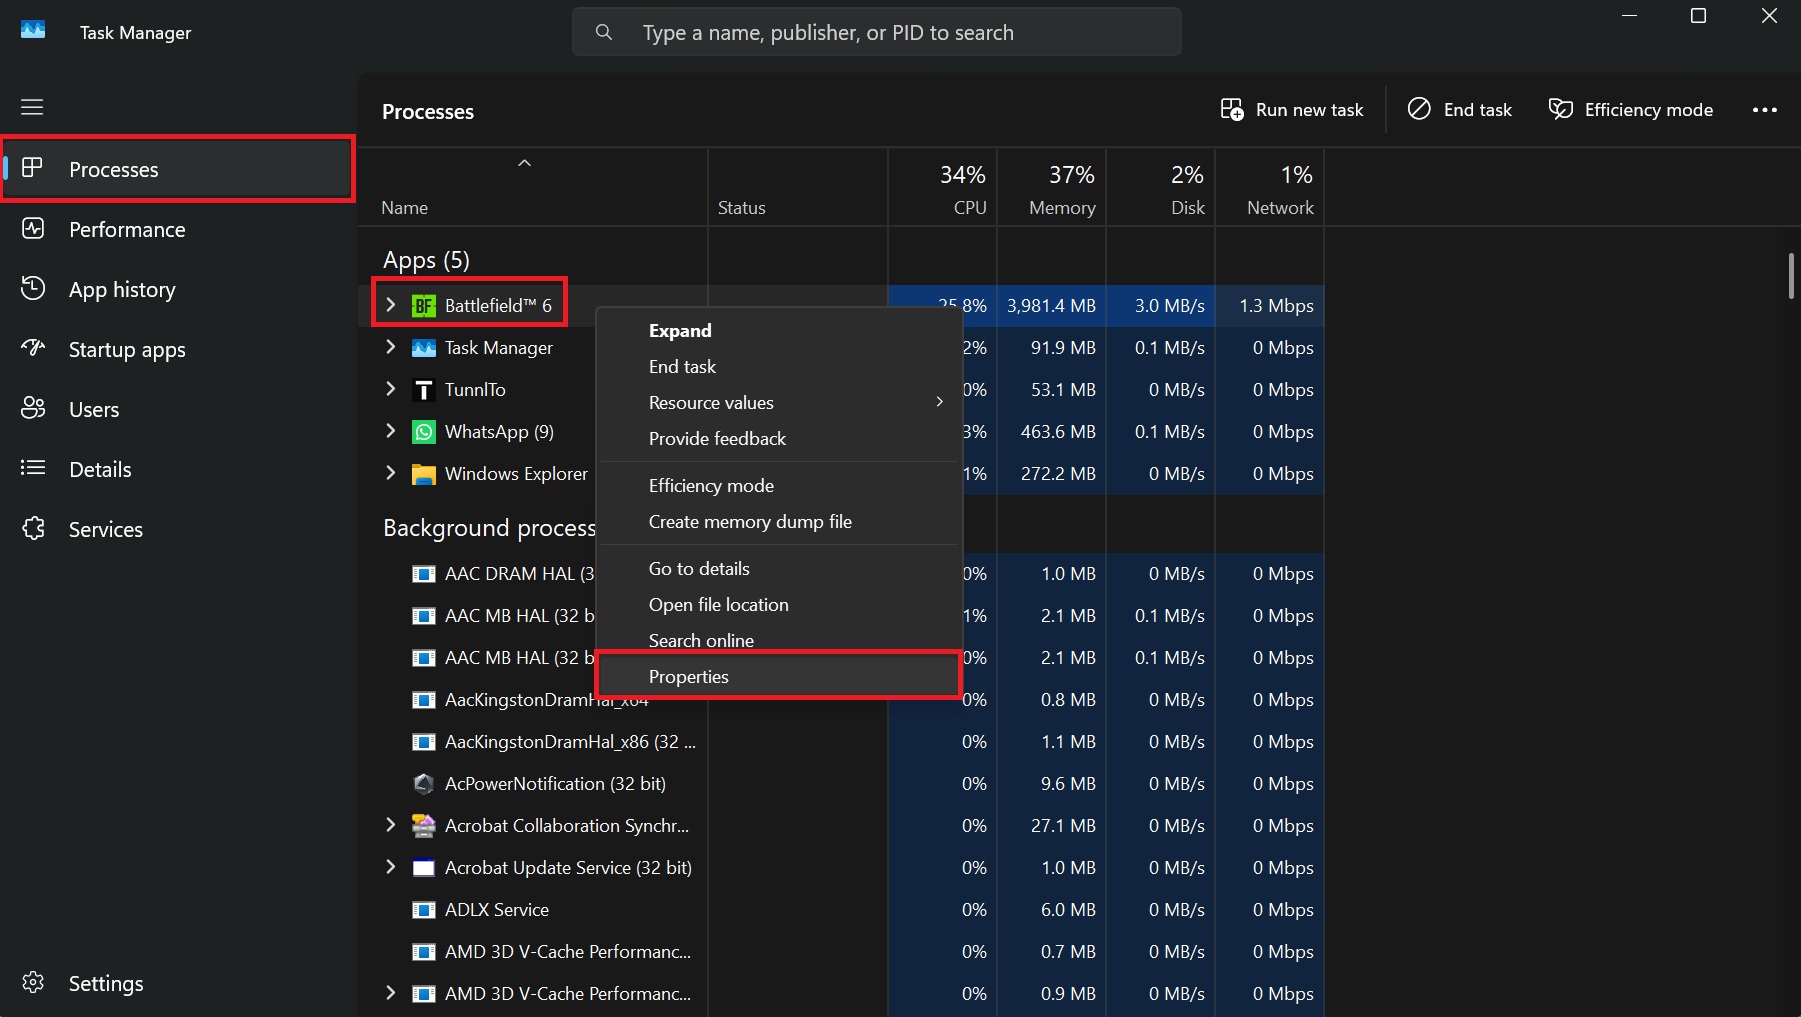
1- Run the game or app you need to get its value temporary
2- Ctrl + Alt + Delete: Brings up the security screen, then select Task Manager
3- Find your Game / App name --> Rick Click --> Select Properties
4- In general tab you will see the following
Game/App name: bf6
Type of file: .exe
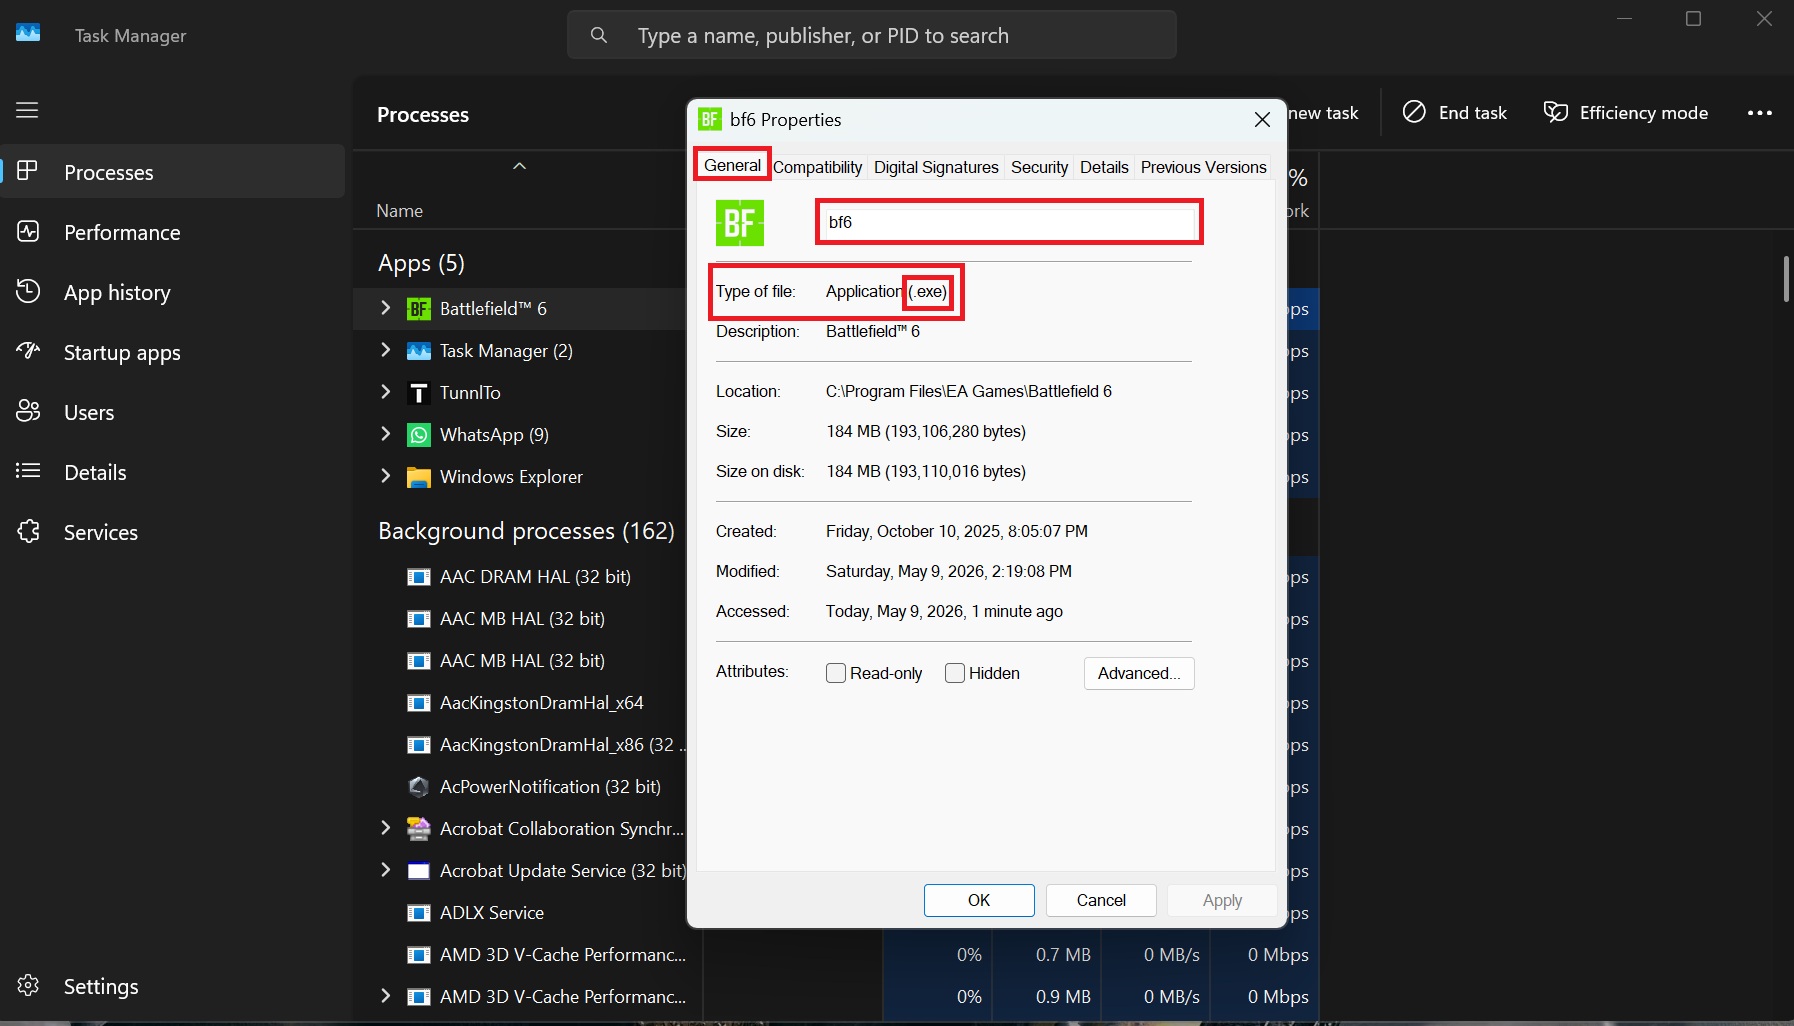
In this case as of Battlefield 6
Value Name to be added in the VPN Rule is: bf6.exe
Conclusion:
Split tunneling is enabled now while your splitting traffic through the VPN. You are able to apply many other rule settings too if you want such as games-apps grouping, per IP Range, per Folder Path and others.
