Set Up WireGuard Split Tunneling on Windows (Recommended)
Split tunneling lets you choose exactly which apps and games run through your POT VPN, while everything else keeps using your normal internet connection. This guide walks you through installing the tool, creating your tunnel, and choosing which programs use the VPN.
Before you begin: you'll need an active POT VPN service, a Windows 10 or 11 PC, and your VPN connection details (in your account — we'll show you where in Step 5).
1. Download the split-tunneling tool
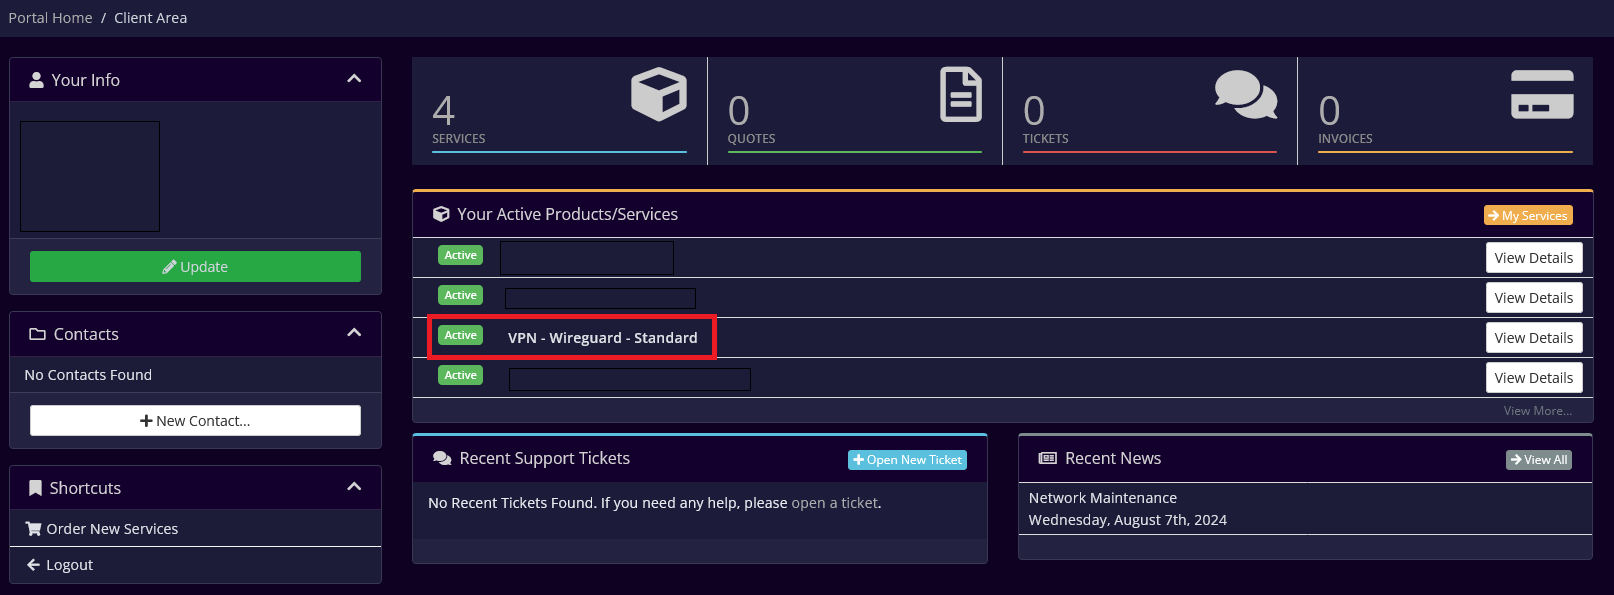
Log in to your account and open your VPN service.
Click Download Windows App.
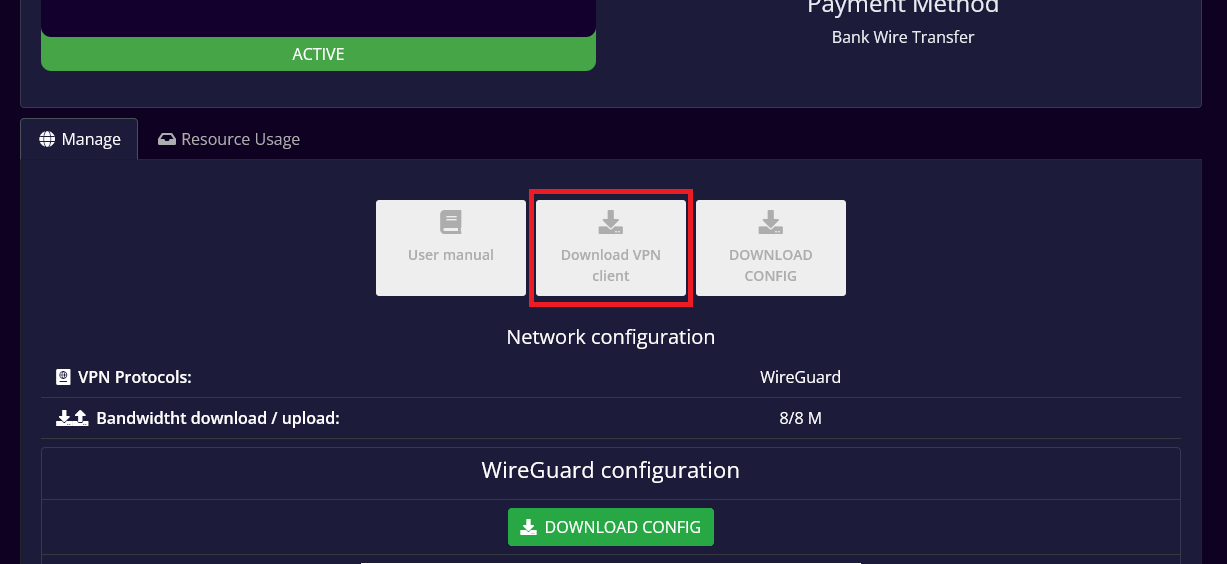
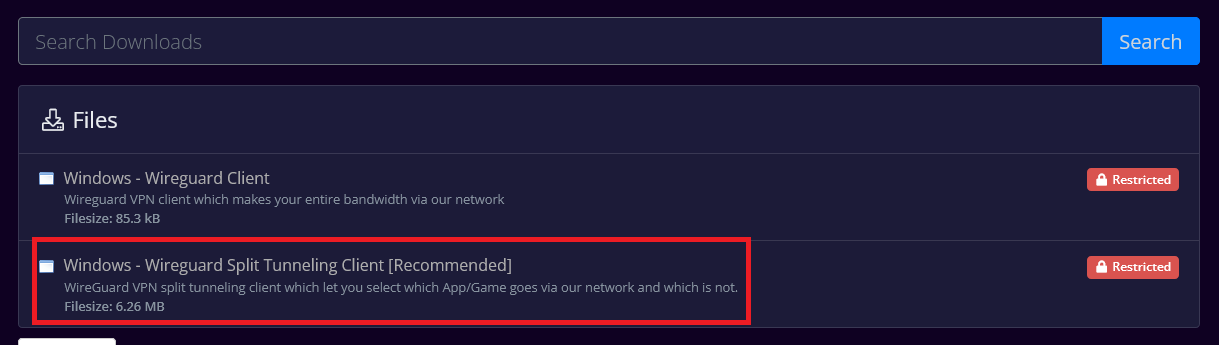
Choose the Windows — WireGuard Split Tunneling Client.
2. Install the tool and Wiresock
Run the downloaded installer and complete the setup.
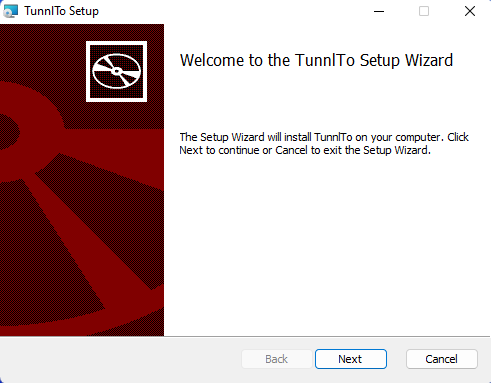
When prompted, install Wiresock — it's bundled with the tool and required for split tunneling to work.

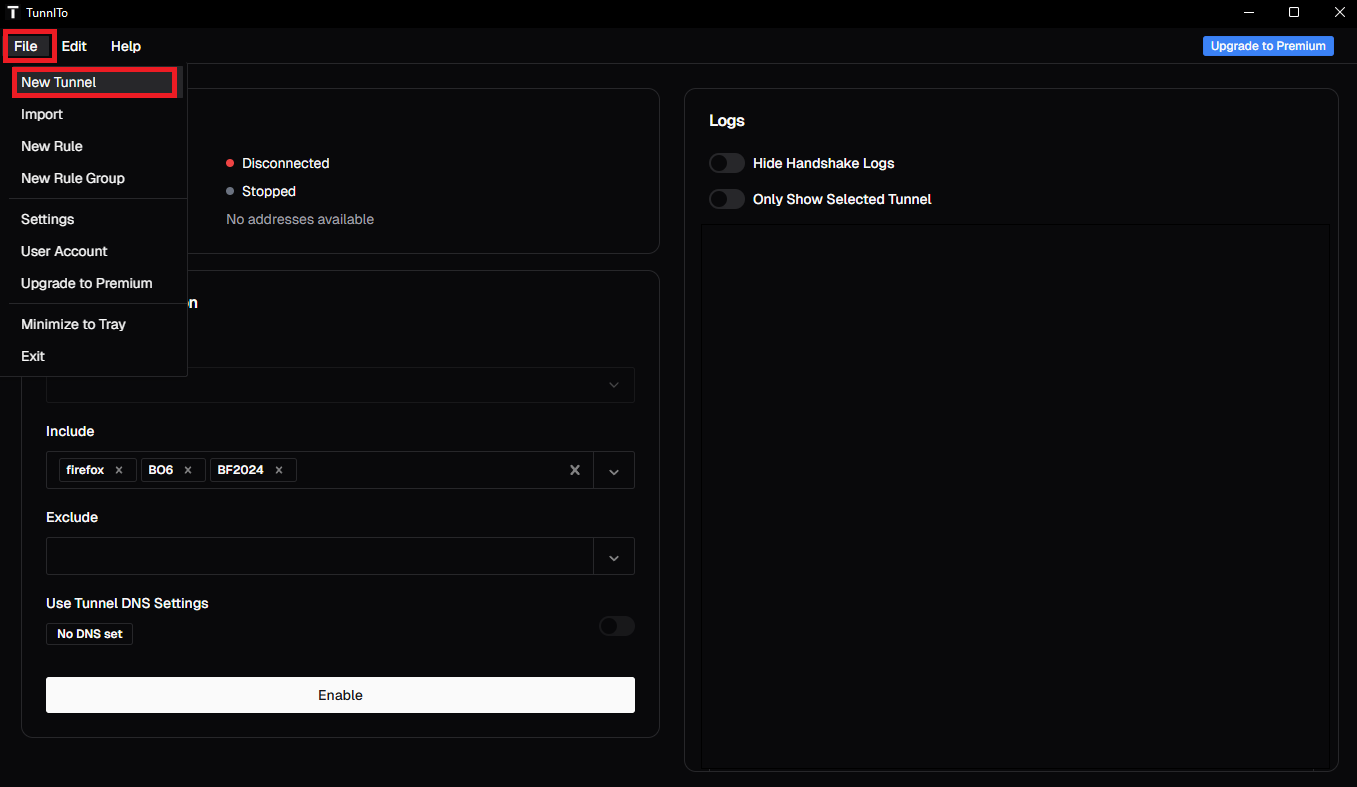
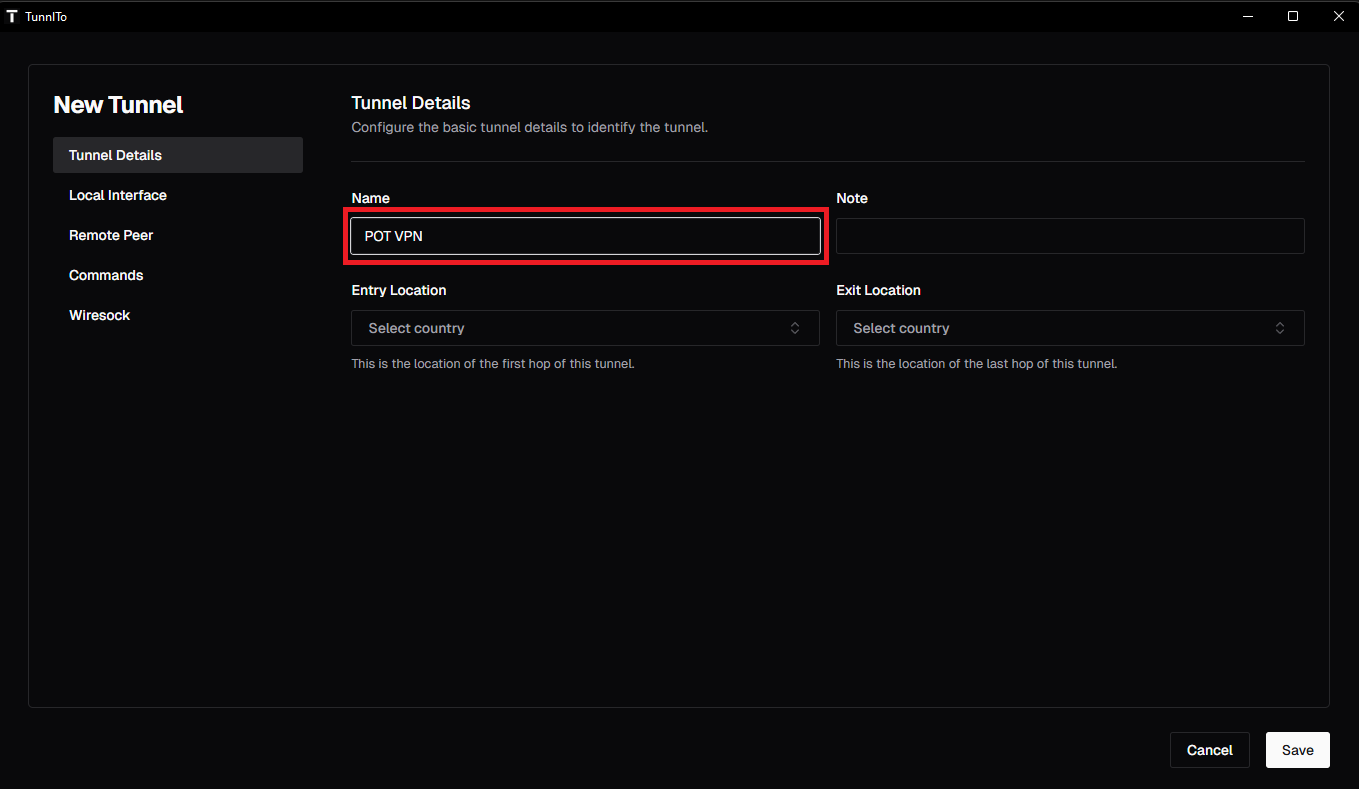
3. Create a new tunnel
Open the tool and click Create Tunnel.
Give it a recognizable name, for example POT VPN.
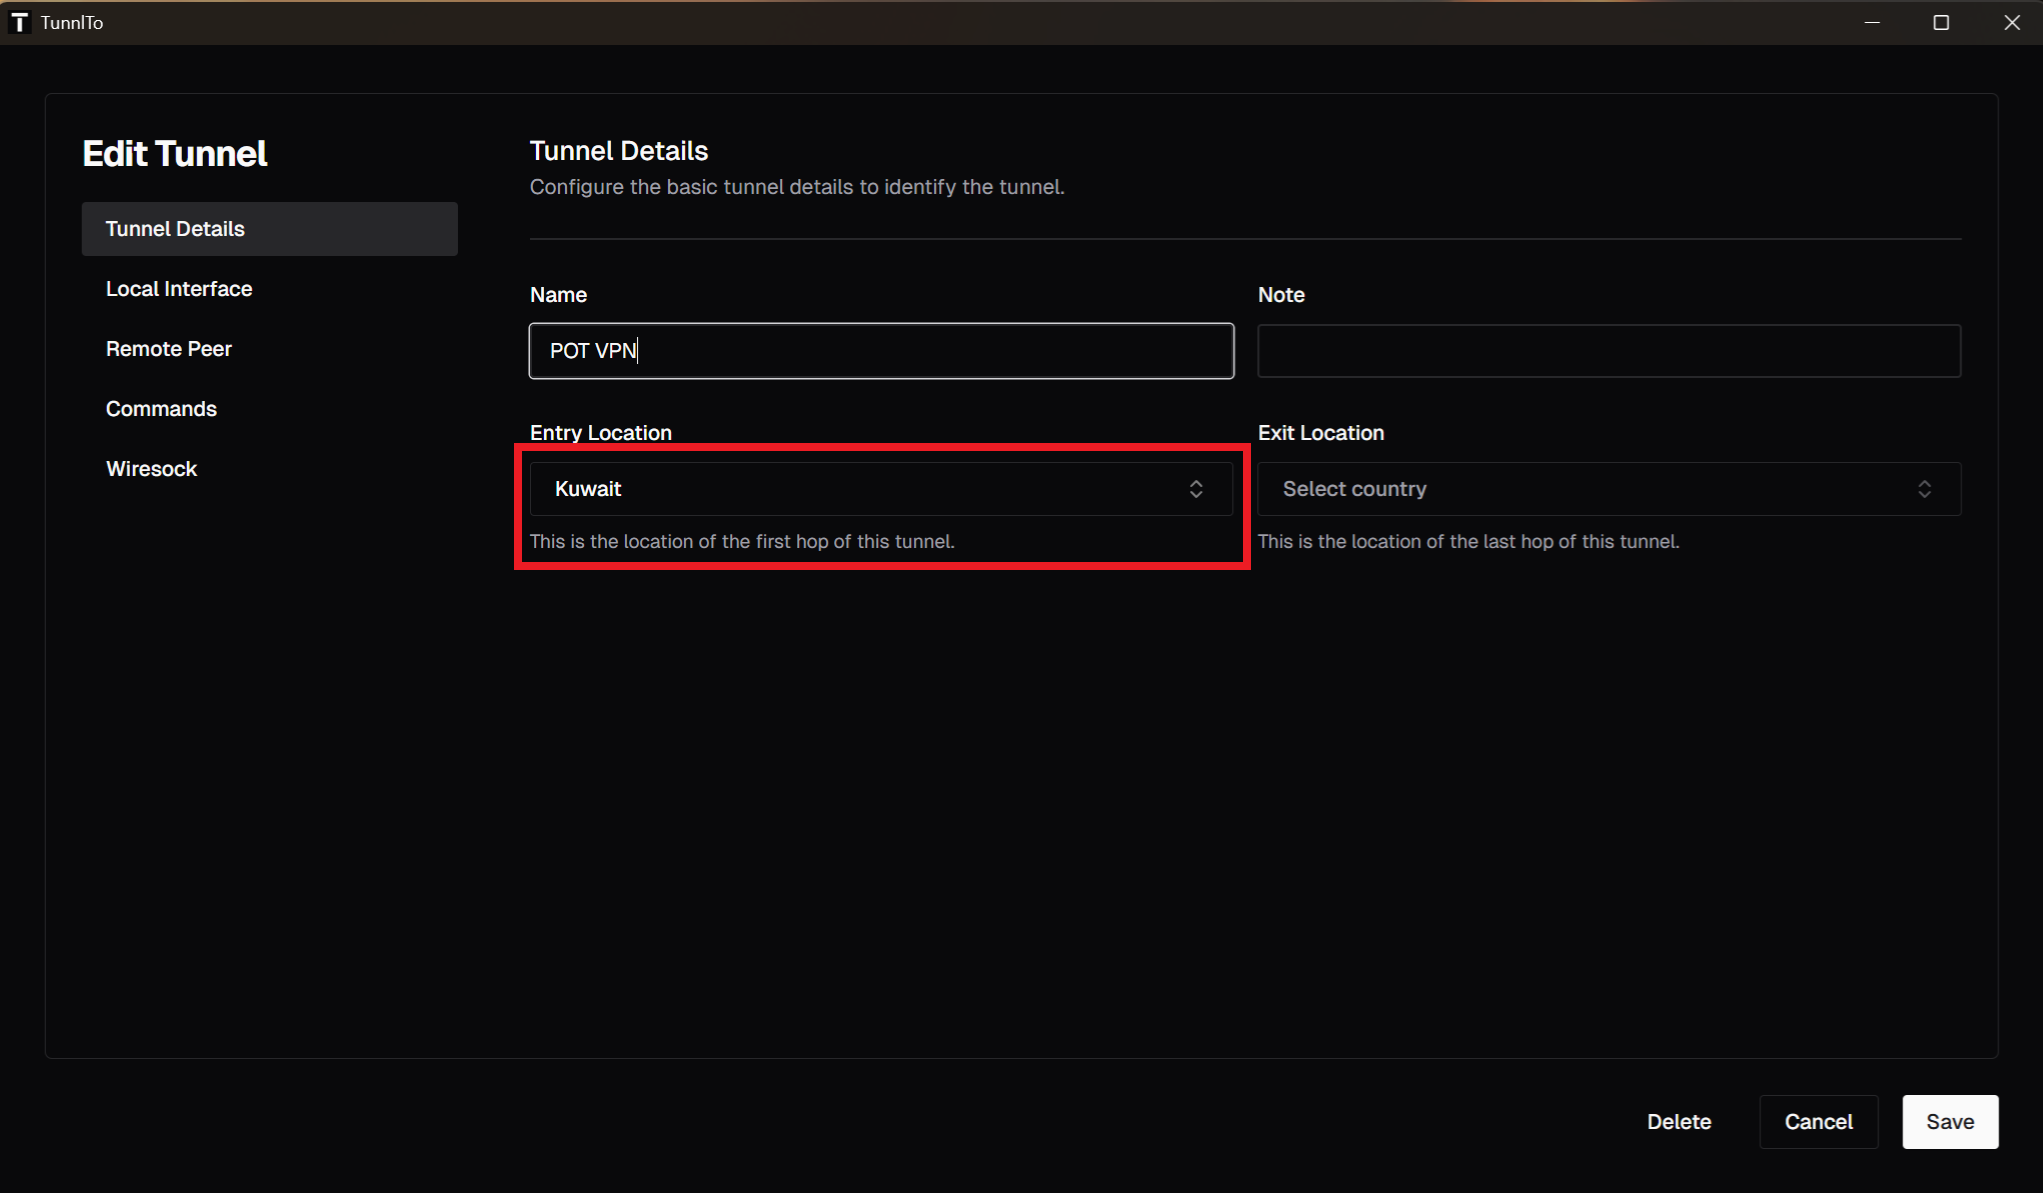
4. Set your entry location
Set Entry location to your country.
Gaming tip: setting this to your own country (e.g. Kuwait) helps the auto-match feature connect you to the closest server in your region for the lowest latency.
5. Open your VPN details
Go back to your VPN service in your account. This page holds every value you'll copy into the tool in the next two steps — keep it open side by side.
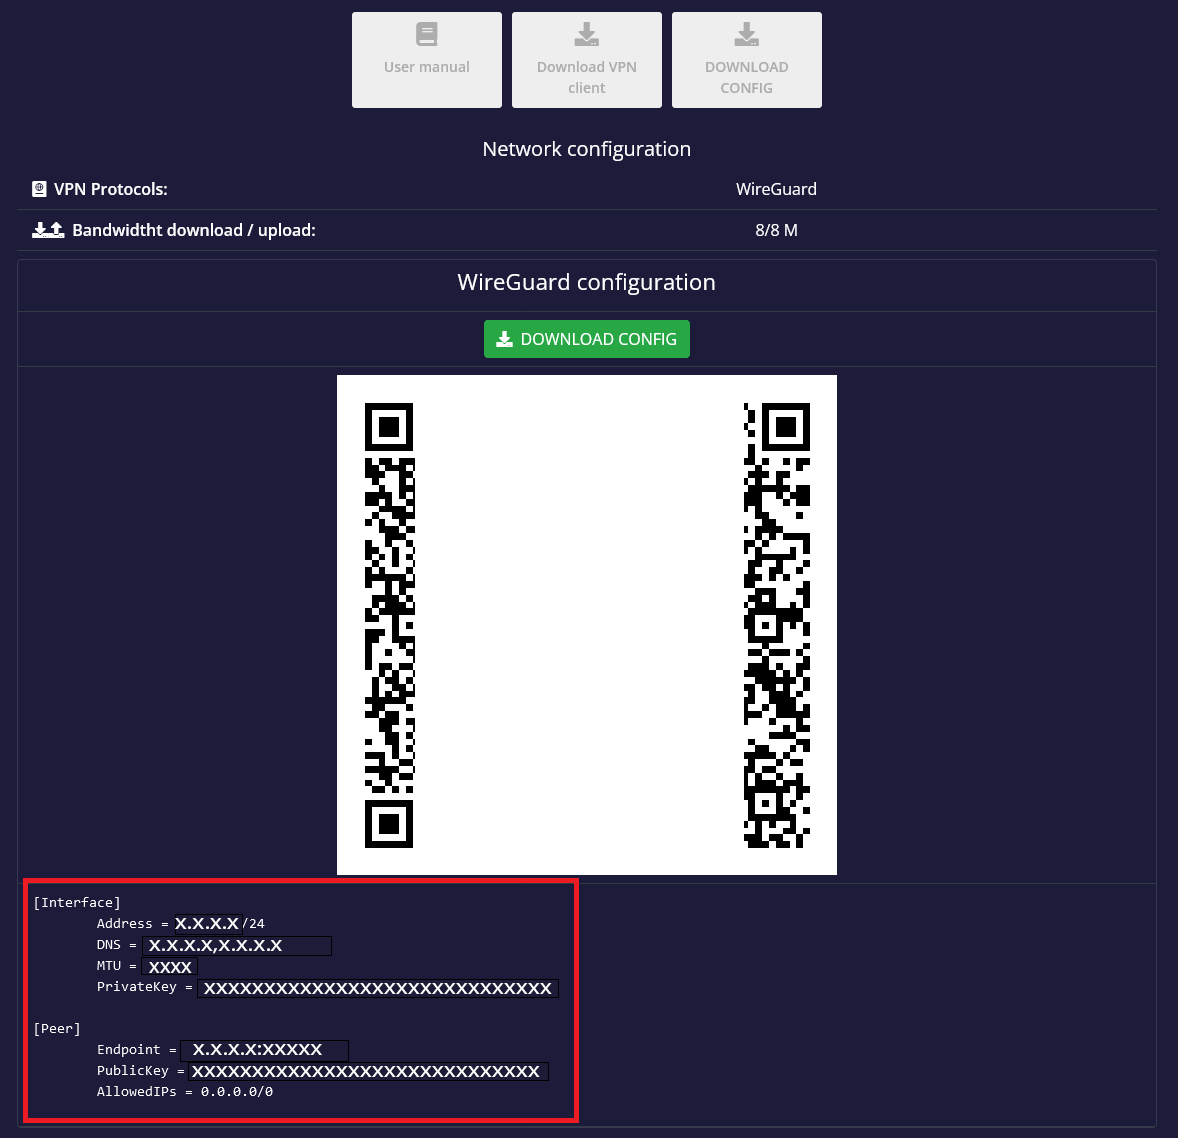
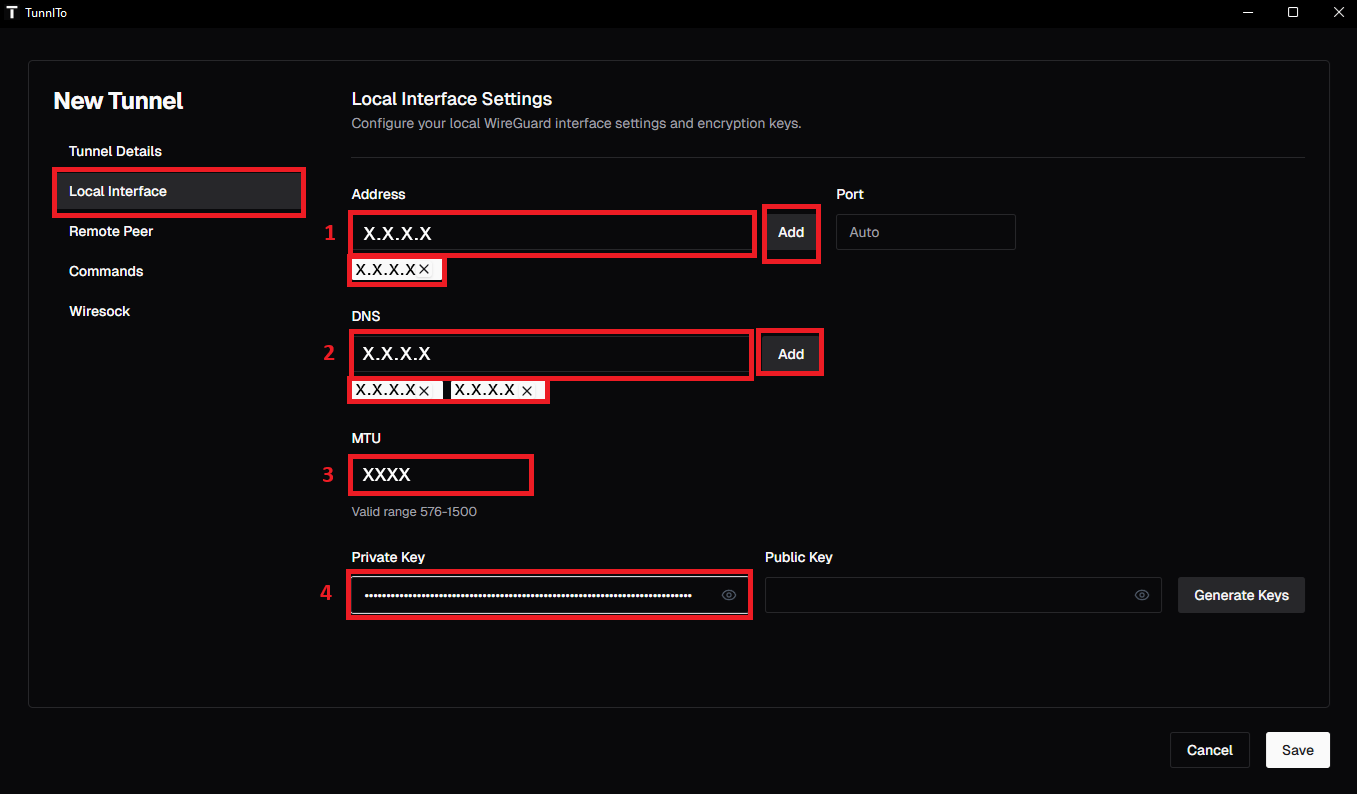
6. Fill in the Local Interface
In the tool's side menu, open Local Interface and copy each value across from your account, exactly as shown below. Click Add where a field has an Add button.
| In your account | Tool field |
|---|---|
| IPv4 | Address |
| DNS | DNS |
| MTU | MTU |
| Private Key | PrivateKey |
Gaming tip: for gaming, try an MTU of
1384instead of the default for optimized latency.

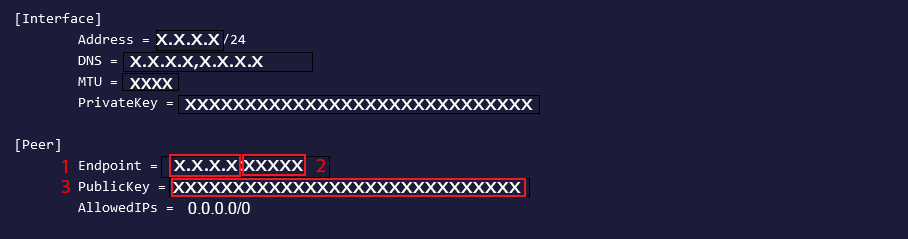
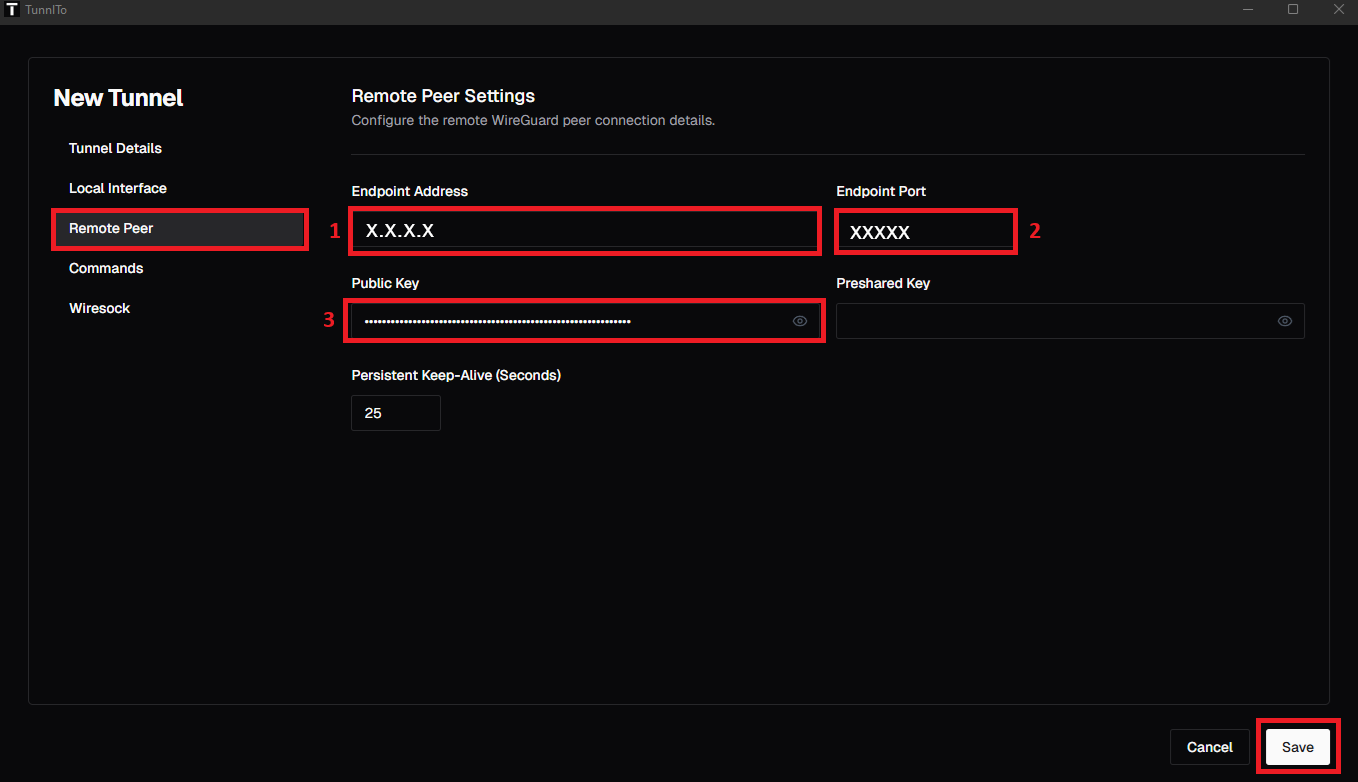
7. Fill in the Remote Peer
Now open Remote Peer in the side menu, copy these values across, then Save.
| In your account | Tool field |
|---|---|
| Endpoint Address | Endpoint |
| Port | Port |
| Public Key | PublicKey |
8. Enable the VPN
Your split-tunnel VPN is ready. Click Enable to activate it.
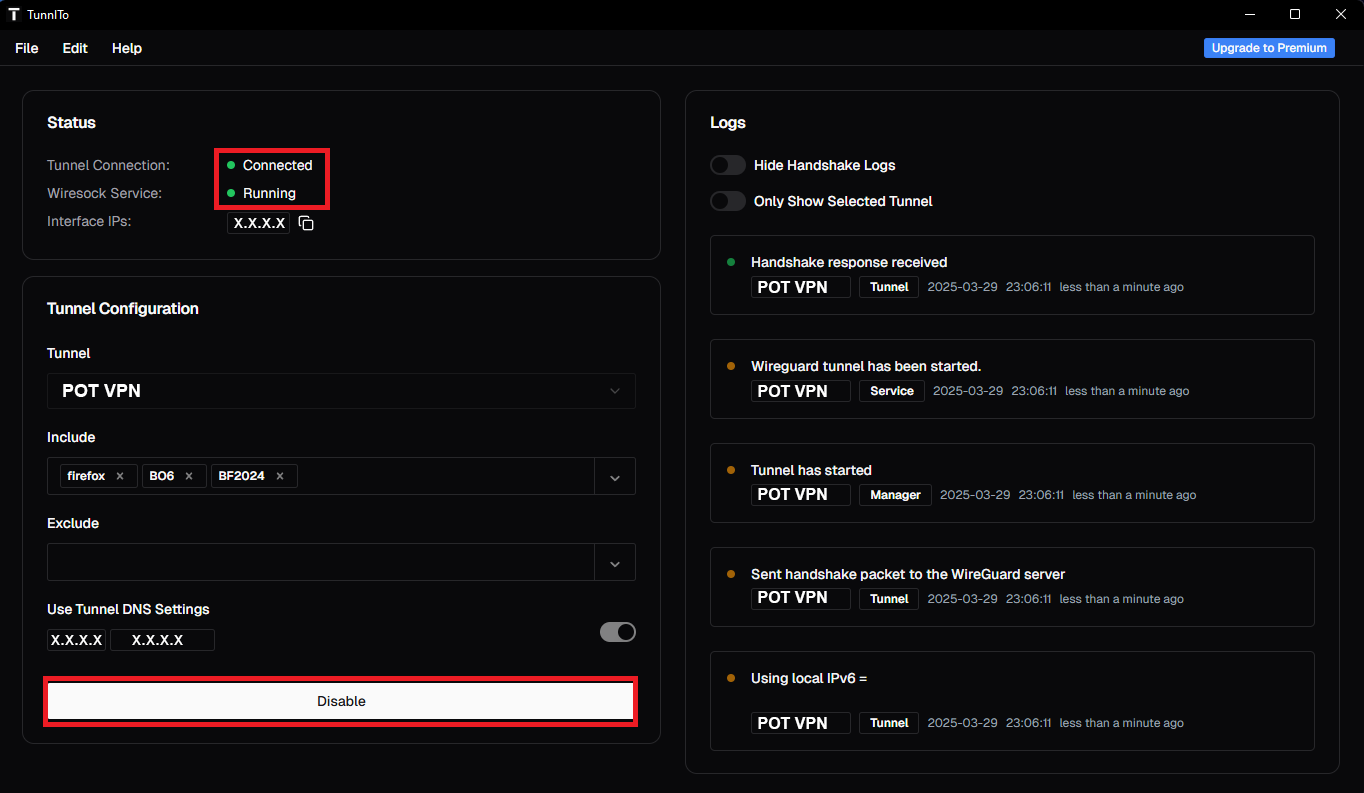
9. Choose which apps use the VPN
This is where split tunneling earns its name: you decide exactly which apps, games, or programs go through the VPN — and which don't. Add these under the Allowed Apps list.
- Leave the list blank to send all applications through the tunnel.
- Separate multiple entries with a comma.
Each app can be entered in any of three ways:
- The full path to the executable — e.g.
C:\Program Files\App\app.exe - The process name without the extension — e.g.
firefox - The process name with the extension — e.g.
firefox.exe
Example use cases
| You want to… | How |
|---|---|
| Route only Firefox through the VPN | Add firefox.exe |
| Route Slack and Office through a work VPN | Add slack.exe, winword.exe |
| Route one game through a gaming VPN | Add the game's .exe |
| Route every game in your Steam folder | Add the Steam folder path |
Note: you can add as many games and apps as you like — just type each filename (with or without the
.exeextension) separated by commas.
Troubleshooting
- Tunnel won't enable? Re-check that the Private Key, Public Key, and Endpoint were copied in full, with no extra spaces.
- An app still uses your normal internet? Confirm its process name matches exactly, then disable and re-enable the tunnel to apply the change.
