Phase 1: Steam Workshop Subscription
As an example for this article, we will use a custom map available on the Steam workshop called "Catania". Once you have located the map mod from our game panel steam workshop as following:
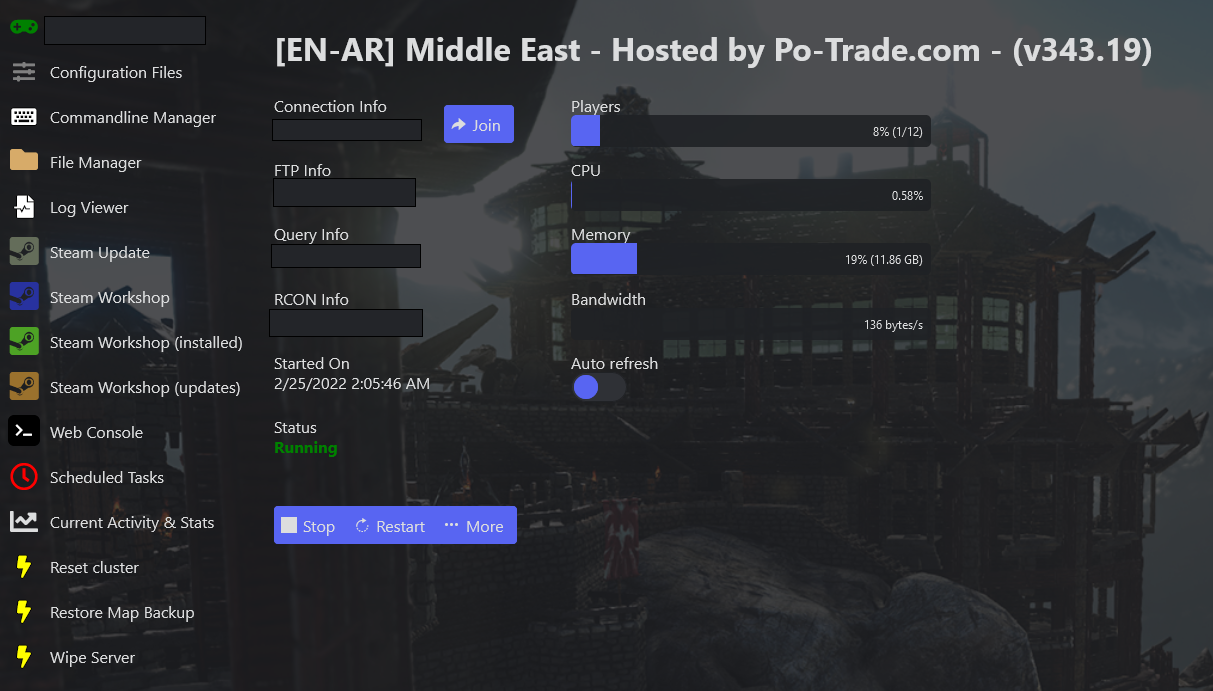
- Login to your account and navigate to your Server status page

- Click on Steam Workshop from the side menu

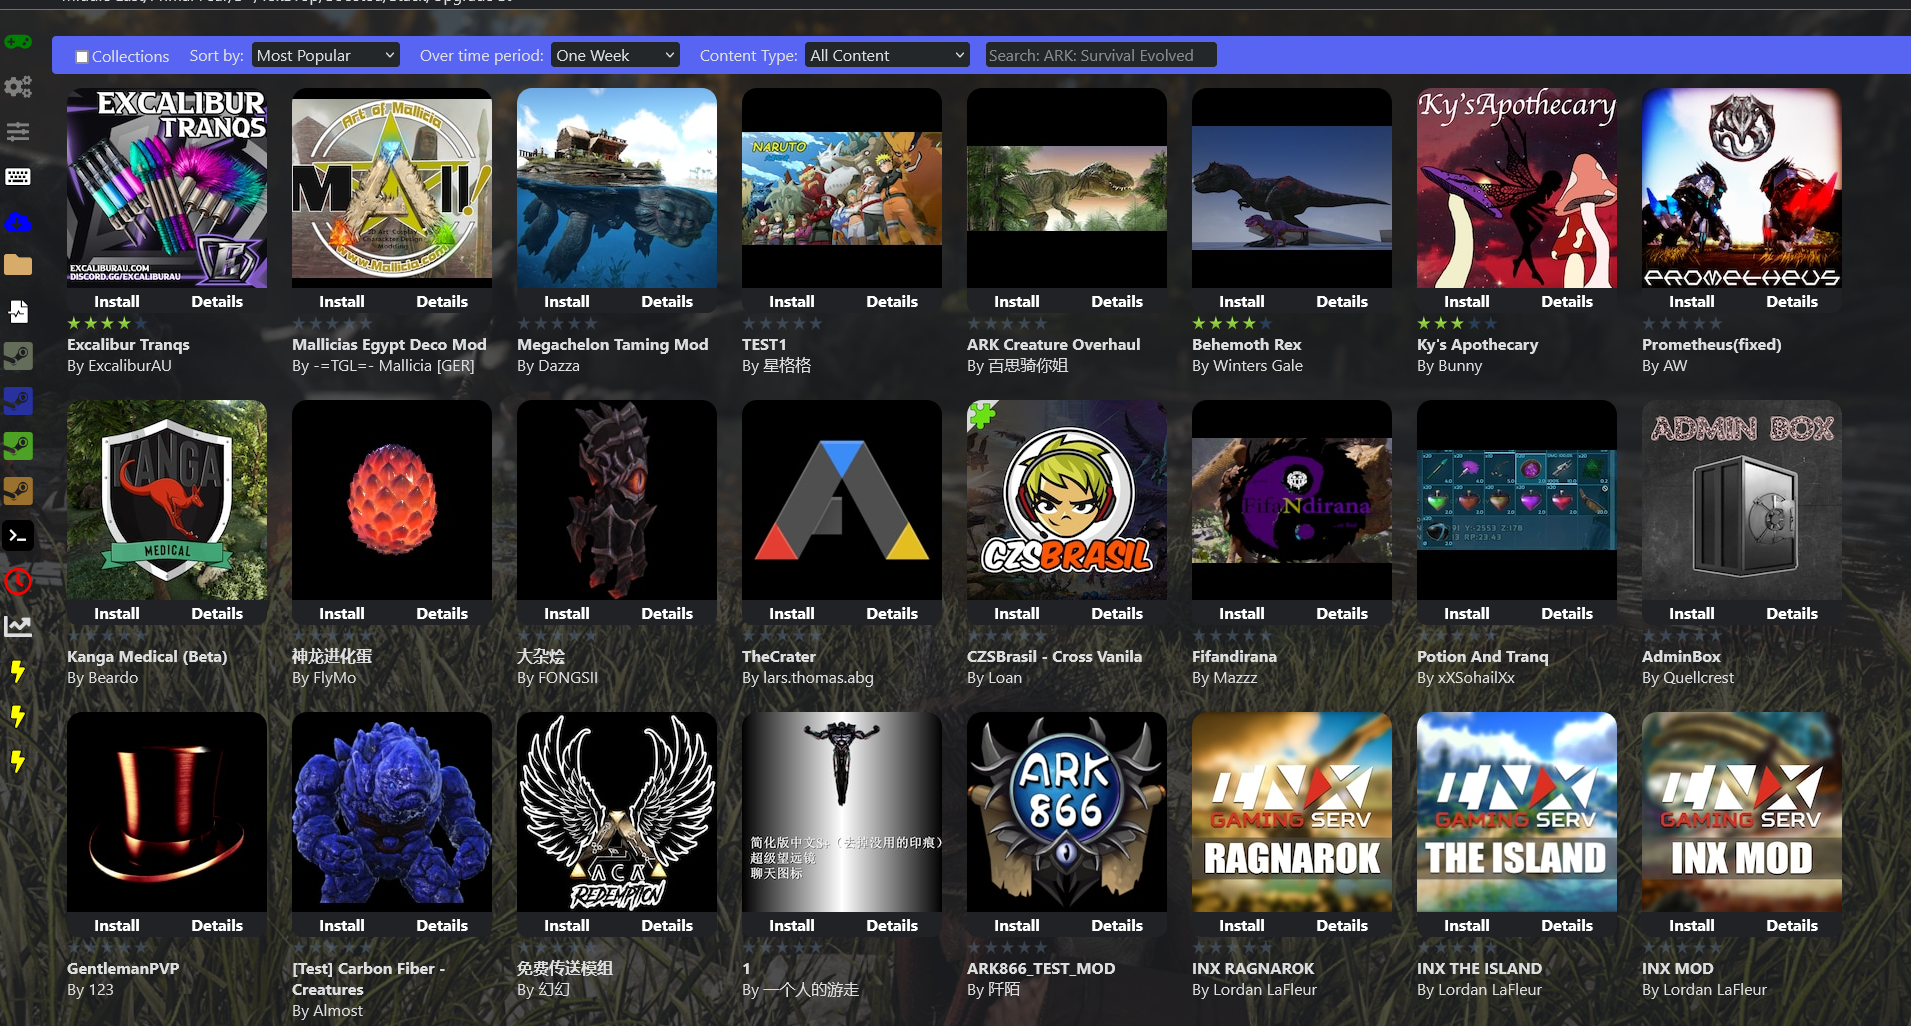
- Search for your Map using the search field on top right and install it

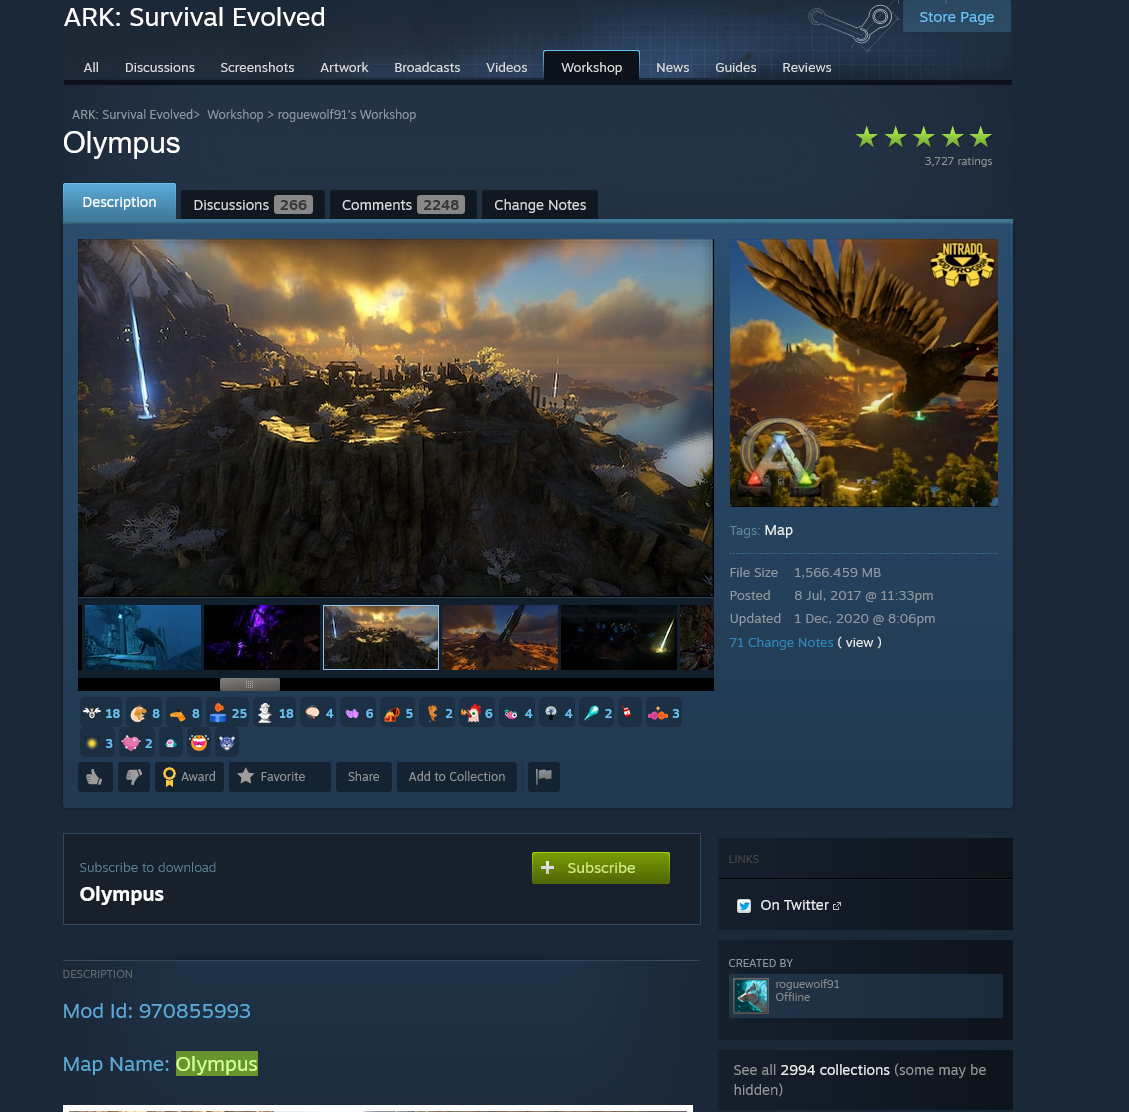
- Once installation is completed, Click on "Details" so you will be redirected to steam page of the map
- Make sure that you check and write down the "Map name" and "Mod ID" from the steam workshop map details
Ex.

Phase 2: Changing the Map in Game Settings
The last step is to set which map the server will actually load on the next startup:
- Go to your server status page again

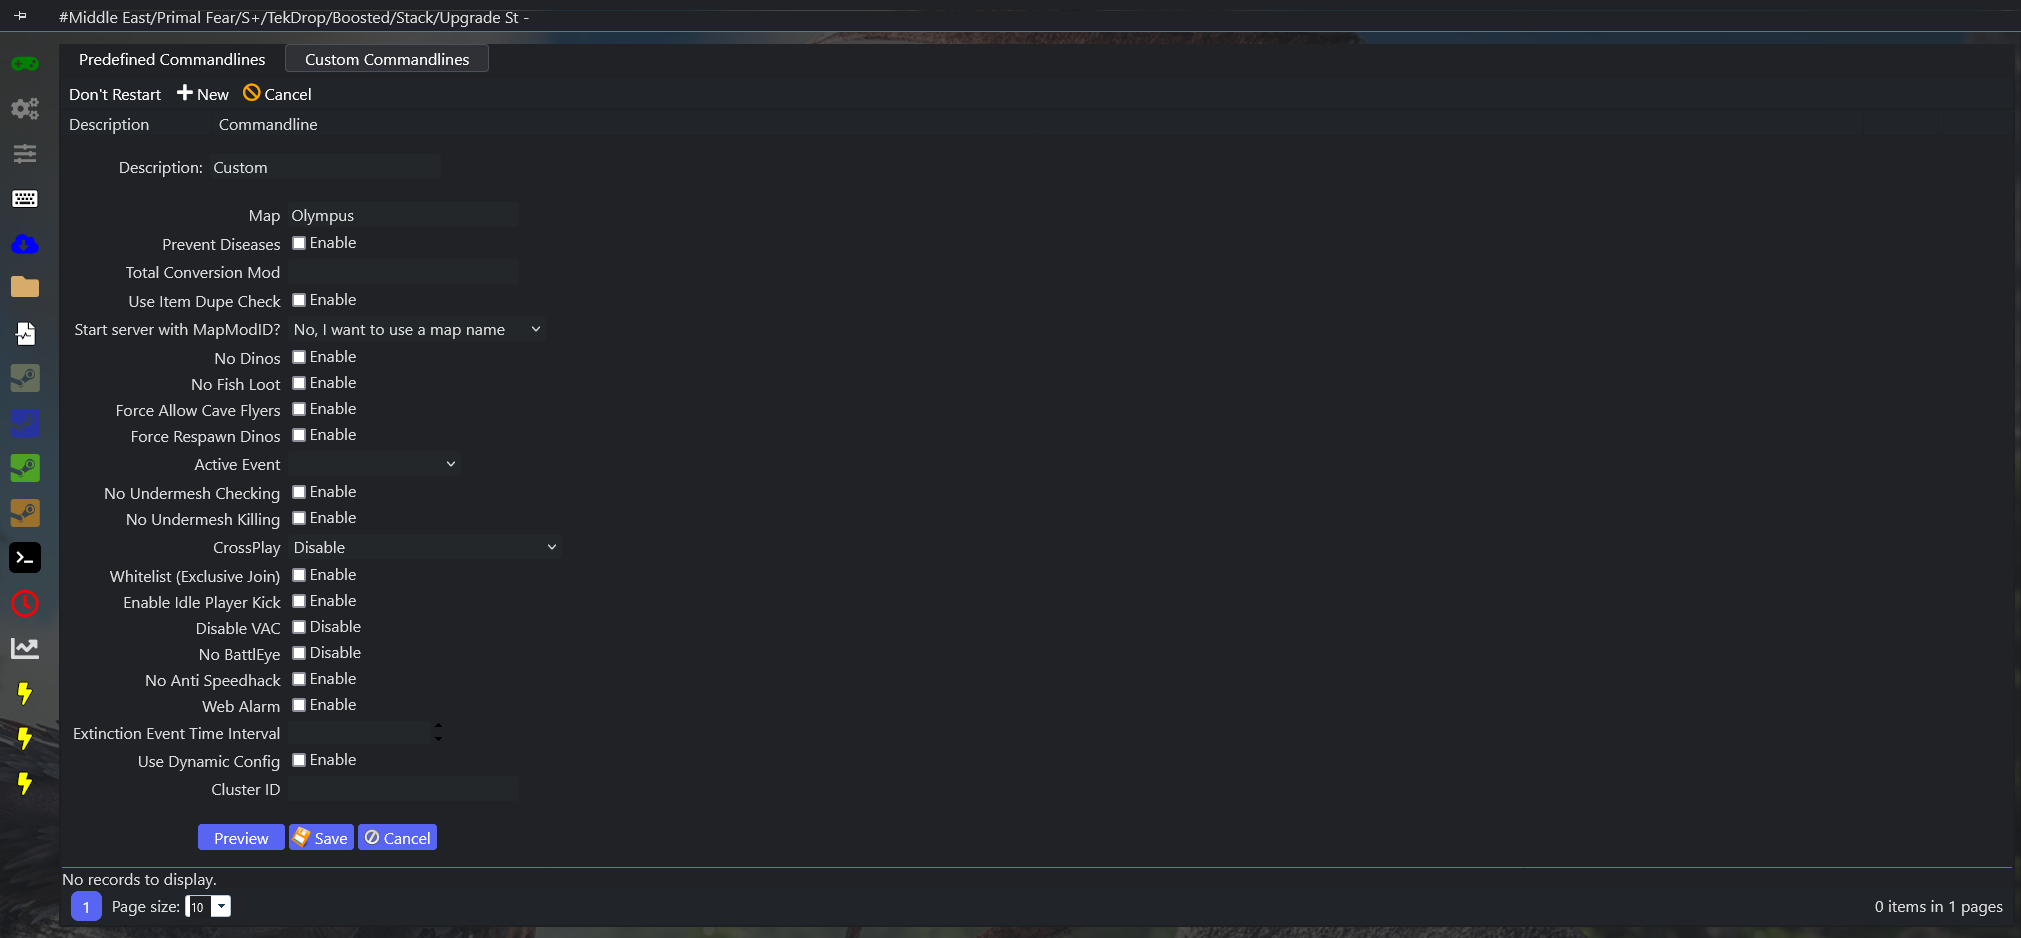
- Navigate to "Commandline Manager" from the side menu

- Click on "Custom Commandlines" from the Tabs

- Click on "+ New" to add a new custom commandline

- In our example we used the map name taken from phase 1 which is "Olympus"
- Make sure that "Start server with MapModID?" is set to "No, i want to use a map name"

- Configure the other settings based on your desire
- "Save" your commandline
- Start your Server
If you want to Use Mod ID instead of Map Name:
You can set a Mod ID instead of map name by selecting:
- Click "Start Server with MapModID" from the drop down menu
- Choose "Yes, i want to use a MAP Mod ID"
- Save and Start the Server
If everything has been set correctly, when you start the server, it should load your custom map!

