Change the RDP Port on Windows Server (When RDP Is Blocked)
We allow RDP on the standard Windows port (TCP 3389), but some countries block it. The fix is to move RDP to a different port. This takes two parts: change the port in the registry, then allow it through the firewall.
Part 1 — Change the RDP port
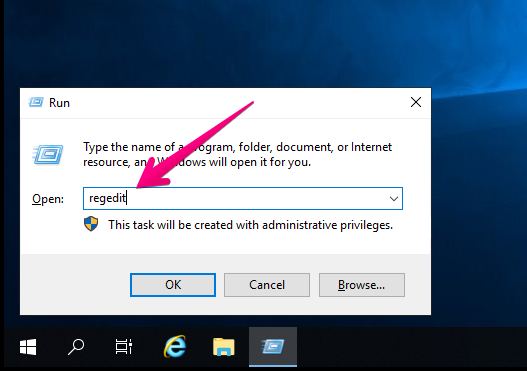
- Open the Registry Editor (type
regeditin the search box).
- Go to
HKEY_LOCAL_MACHINE\System\CurrentControlSet\Control\Terminal Server\WinStations\RDP-Tcp.
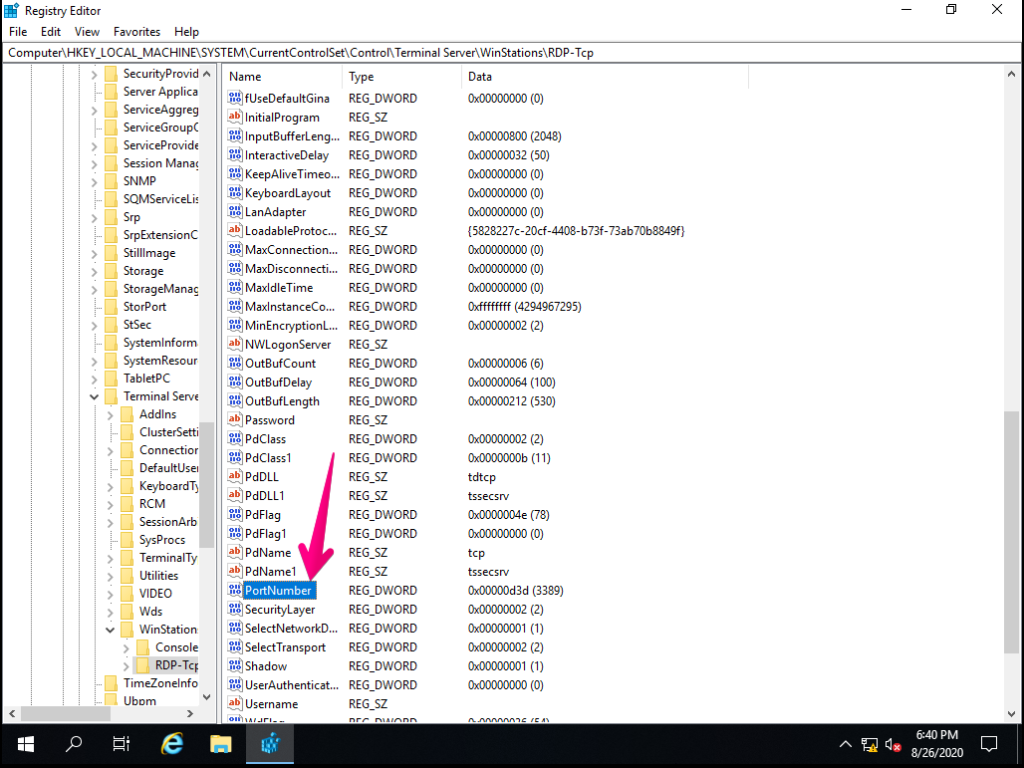
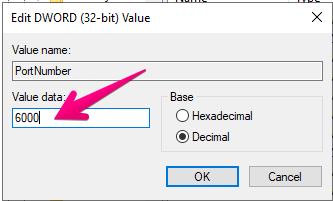
- Find PortNumber, click Edit → Modify, select Decimal, enter your new port (e.g.
3390), and click OK. Close the Registry Editor.
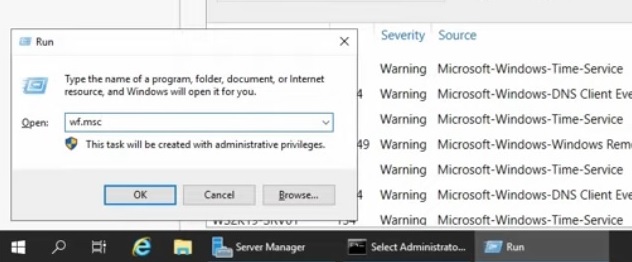
Part 2 — Allow the new port through the firewall
- Type
wf.mscin the search box to open Windows Defender Firewall.
- Right-click Inbound Rules and choose New Rule.
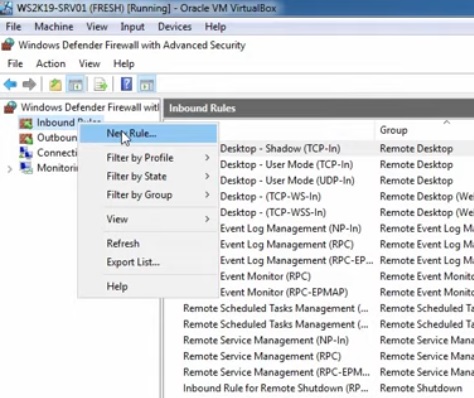
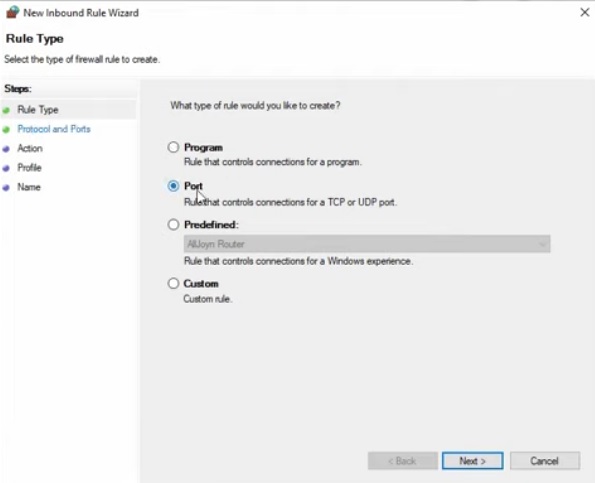
- Select Port and click Next.
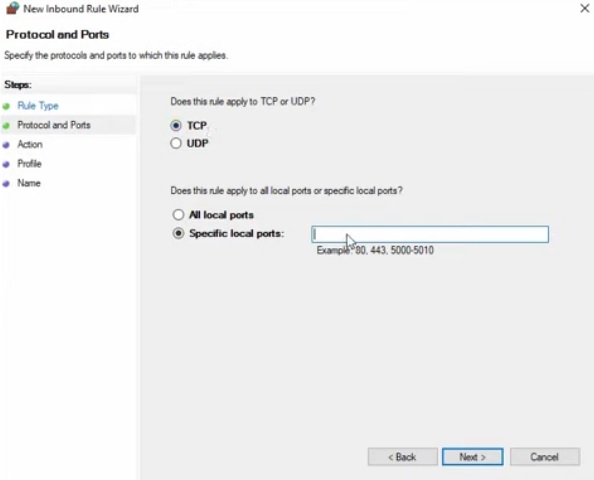
- Choose TCP, enter your new port under Specific local ports (e.g.
3390), and click Next.
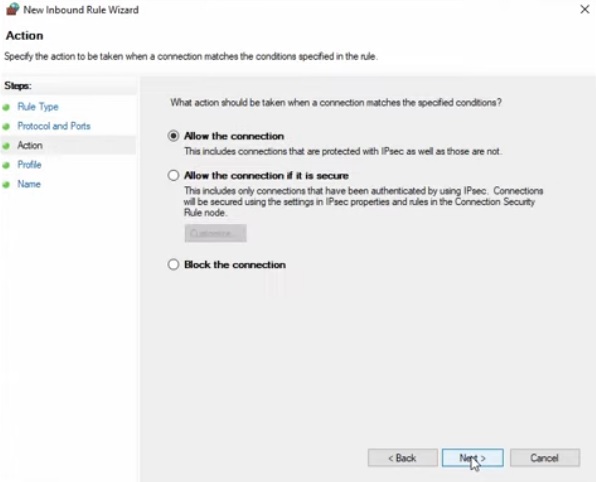
- Choose Allow the connection, then Next.
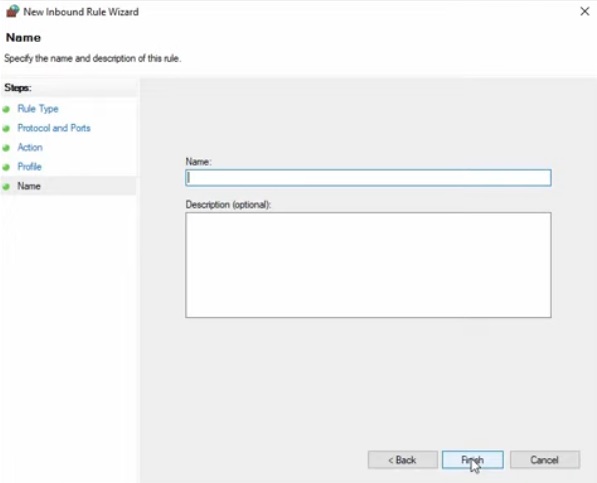
- Leave all profiles selected, click Next, name the rule (e.g. Custom RDP Port (TCP 3390)), and click Finish.
Optional but recommended: since you're no longer using the default RDP port, disable the default RDP firewall rules — right-click each and choose Disable Rule:
- Remote Desktop - Shadow (TCP-In)
- Remote Desktop - User Mode (TCP-In)
- Remote Desktop - User Mode (RDP-In)

Connect
- Restart your server to apply the changes.
- Connect by adding
:3390after your server IP (e.g.your.server.ip:3390).

