Put Your Website Online (Point Your Domain to Your Hosting)
You bought a domain from a registrar and built your website in your hosting control panel. The last step is to connect your domain to your website by pointing it at our nameservers. This guide walks you through it for the most popular registrars.
You'll need: your domain (from any registrar) and your DNS/nameserver info from us (sent by email and shown in your account when you order web hosting).
The recommended setup is to use your hosting control panel as the primary DNS server — it then creates and manages all your website's DNS records automatically. It comes down to two things: add glue records for the nameservers, then point your domain to those nameservers.
Step 1 — Get your nameservers (all registrars)
- Log in to your hosting control panel.
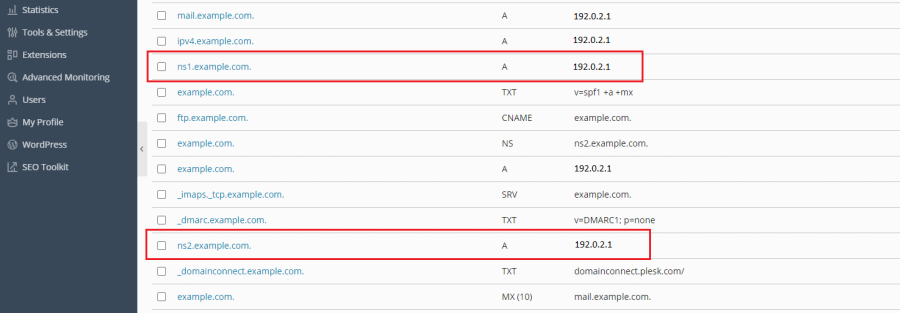
- Go to Websites & Domains → your domain → Hosting & DNS → DNS Settings.
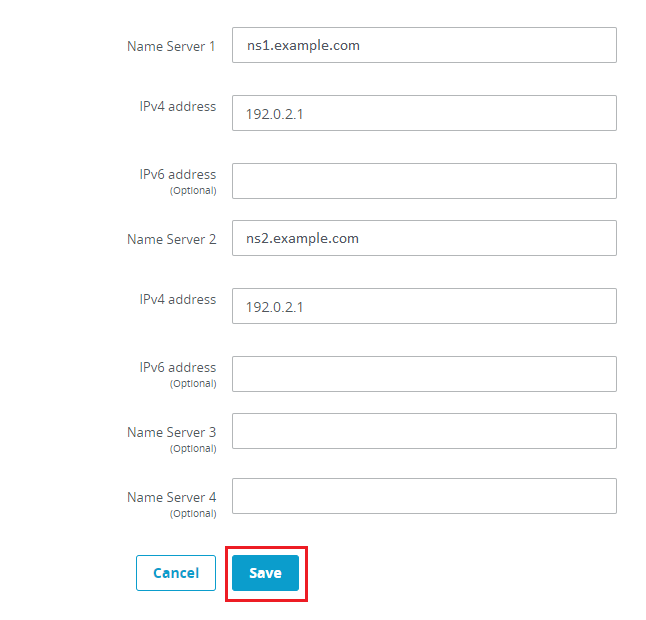
- Find your two glue records, which look like this:
ns1.<your-domain>   <your server IP>
ns2.<your-domain>   <your server IP>
Copy the two nameserver hostnames (ns1.<your-domain> and ns2.<your-domain>) and the server IP address — you'll need them at your registrar.
Now follow the section for your registrar below.
Hover (Enom)
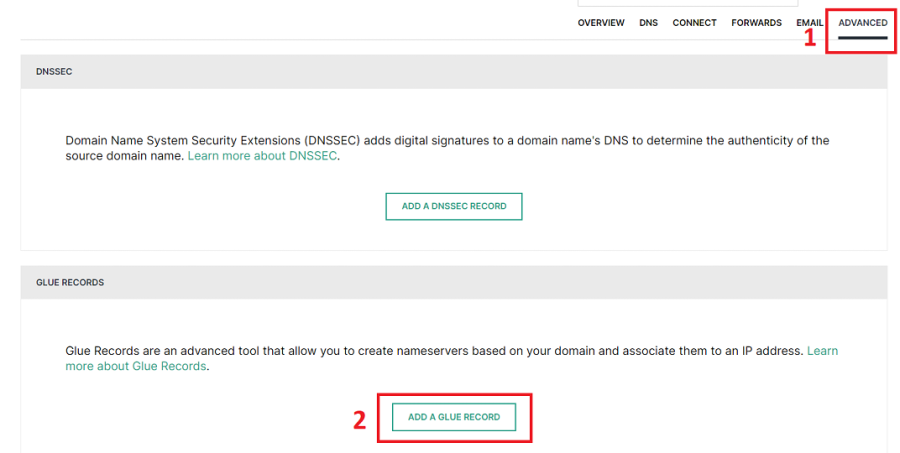
- Log in to Hover and open the domain you're configuring.
- Go to the Advanced tab and click Add a Glue Record.
- Add the first record:
ns1.<your-domain>with your server IP, then click Add Record.
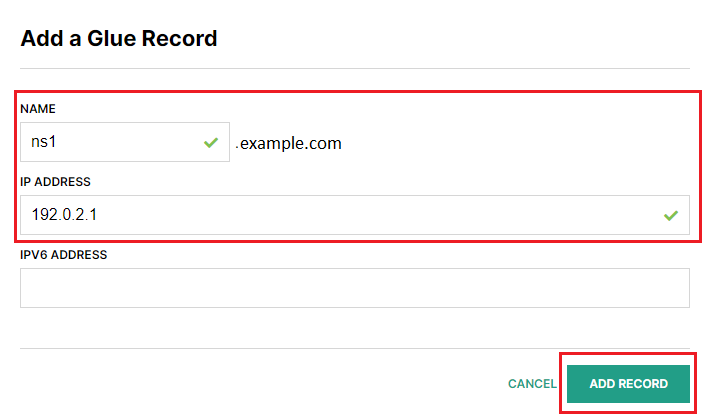
- Repeat for the second record (
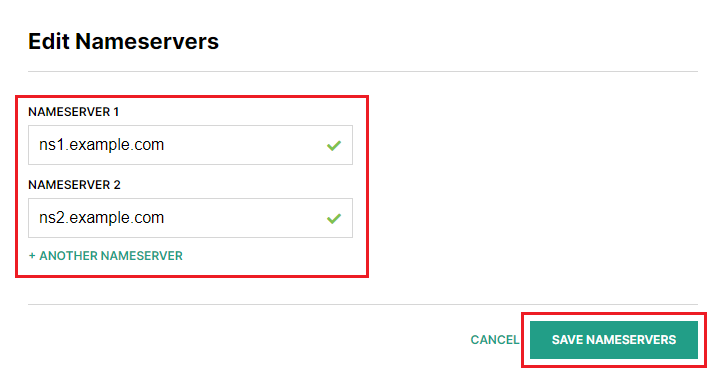
ns2.<your-domain>). - Go to the Overview tab, find Nameservers, and click Edit.
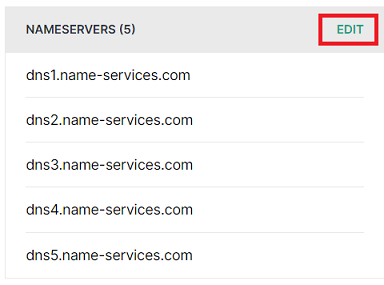
- Keep only two nameservers, set them to
ns1.<your-domain>andns2.<your-domain>, and click Save Nameservers.
GoDaddy
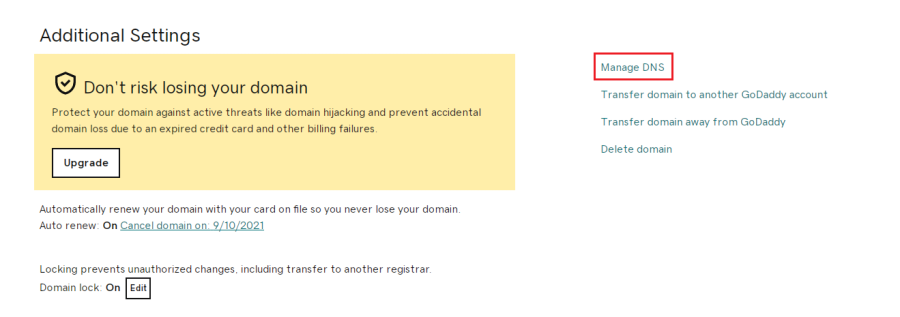
- Log in to the GoDaddy Domain Manager, click your domain, and under Additional Settings click Manage DNS.
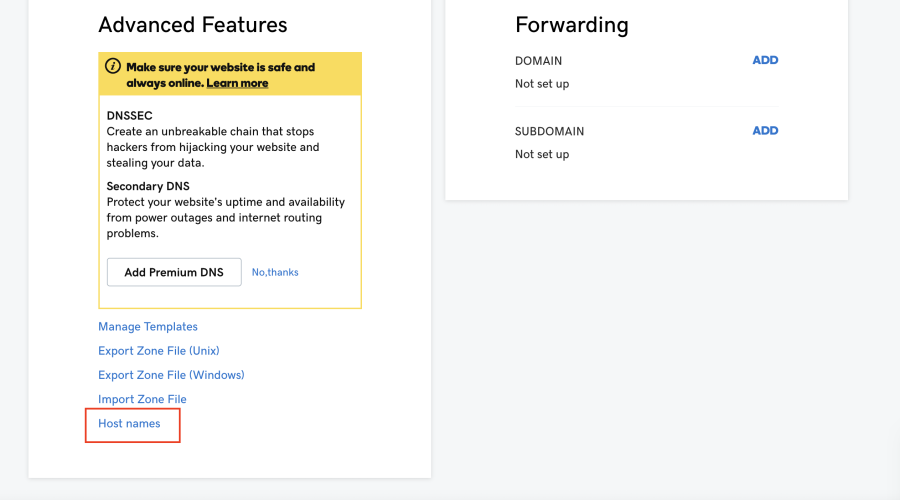
- Under Advanced Features, click Host names, then Add.
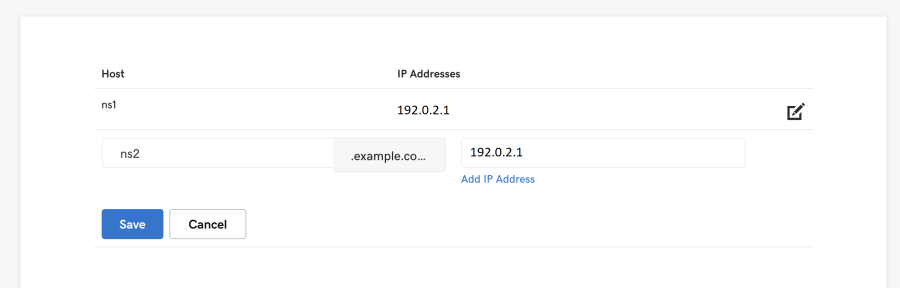
- Add
ns1.<your-domain>andns2.<your-domain>with your server IP, then Save.
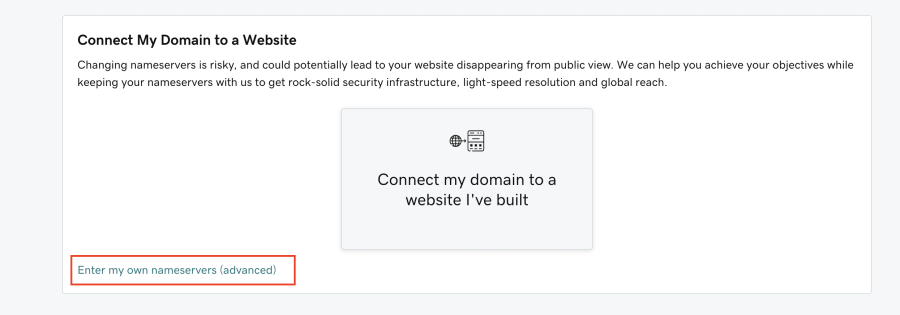
- Next to Nameservers, click Change.
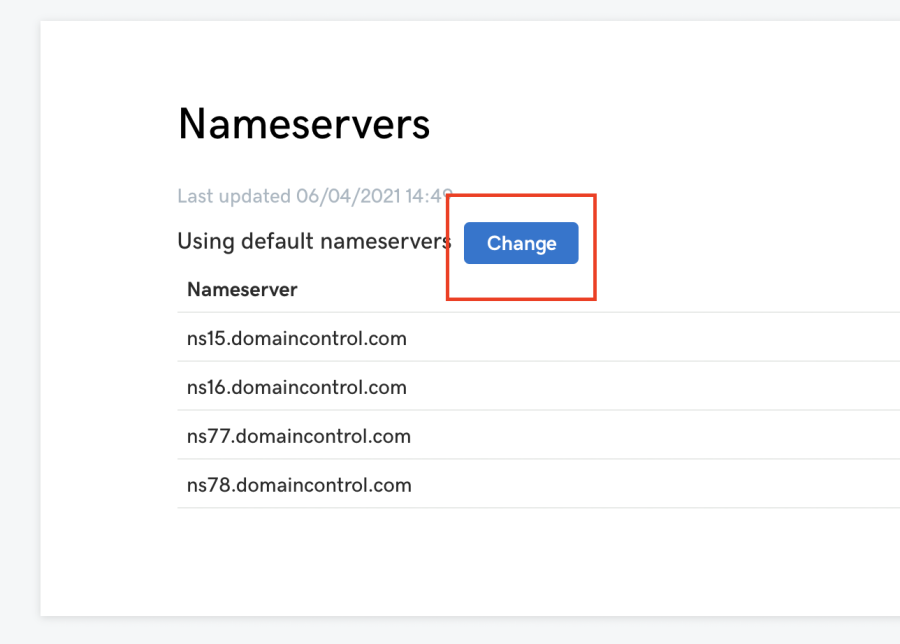
- Choose Enter my own nameservers (advanced).
- Enter
ns1.<your-domain>andns2.<your-domain>and click Save.

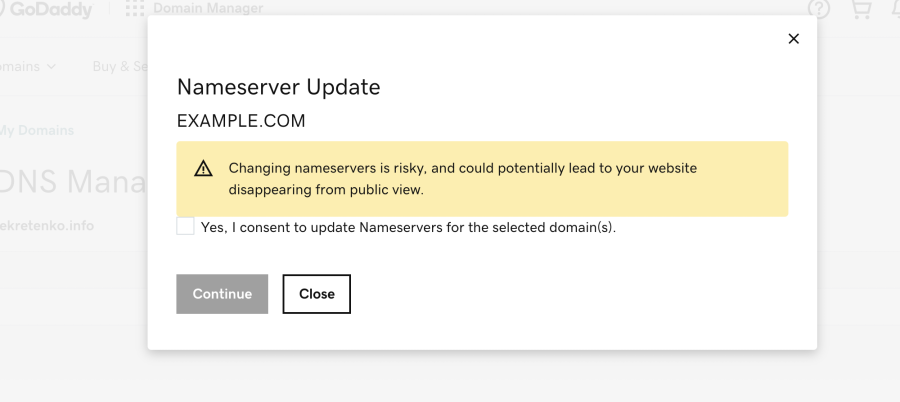
- Confirm with Yes, I consent and click Continue.
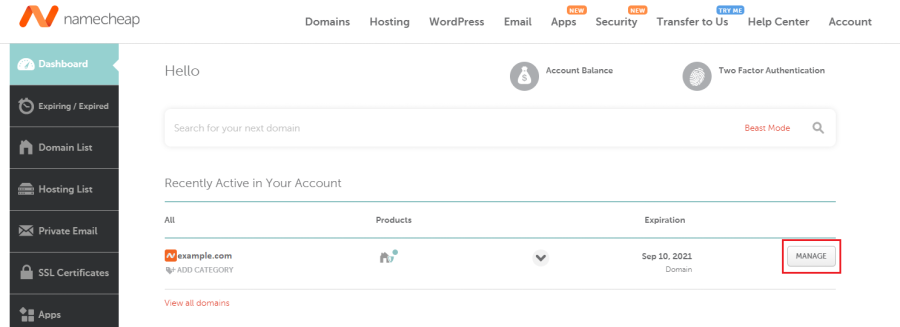
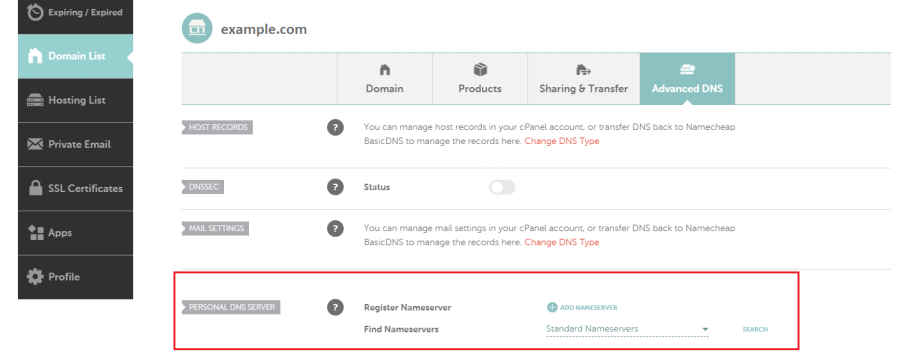
Namecheap
- Log in to Namecheap and click Manage next to your domain.
- Open the Advanced DNS tab and scroll to Personal DNS Server.
- Click Add Nameserver, choose
ns1, enter your server IP, and click Done.
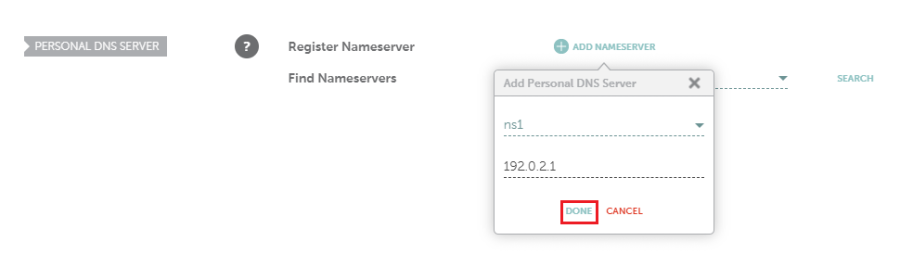
- Repeat for
ns2. (Click Search in that section if the new records don't appear right away.)

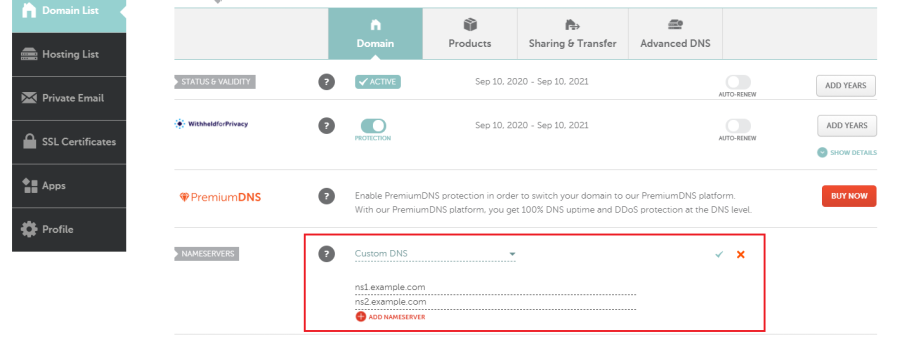
- Open the Domain tab, set Nameservers to Custom DNS, enter
ns1.<your-domain>andns2.<your-domain>, and save.
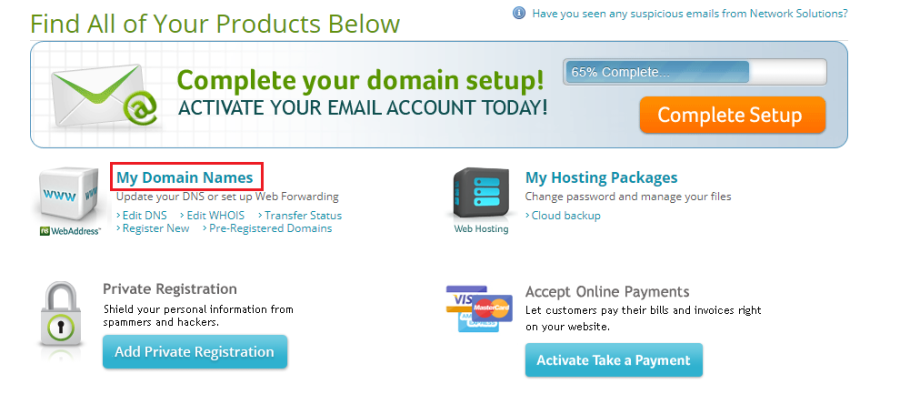
Network Solutions
- Log in to Network Solutions and click My Domain Names.
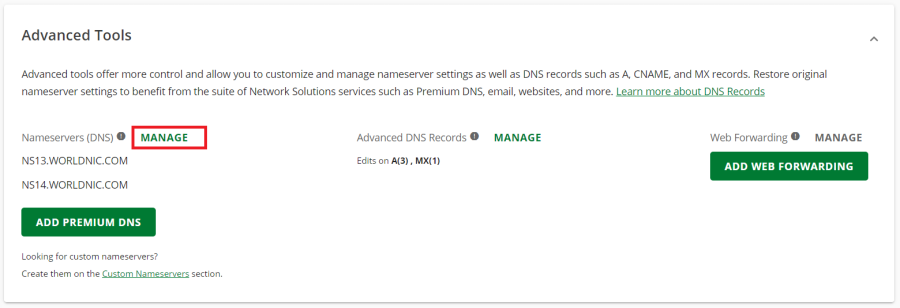
- Under your domain, expand Advanced Tools.

- Next to Nameservers (DNS), click Manage.
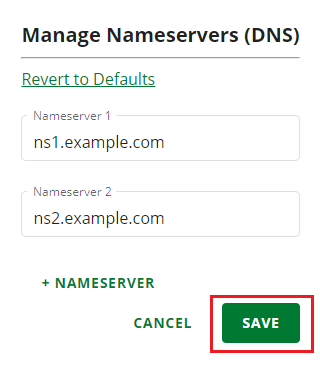
- Add
ns1.<your-domain>andns2.<your-domain>, then Save.
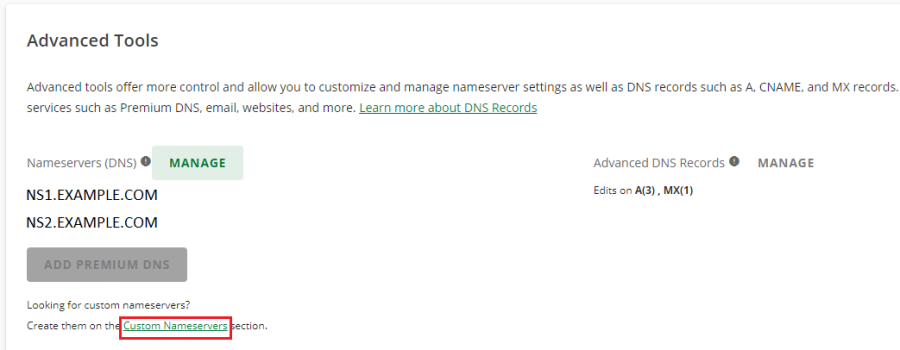
- At the bottom of Advanced Tools, click Custom Nameservers.
- Find the two nameservers you added.
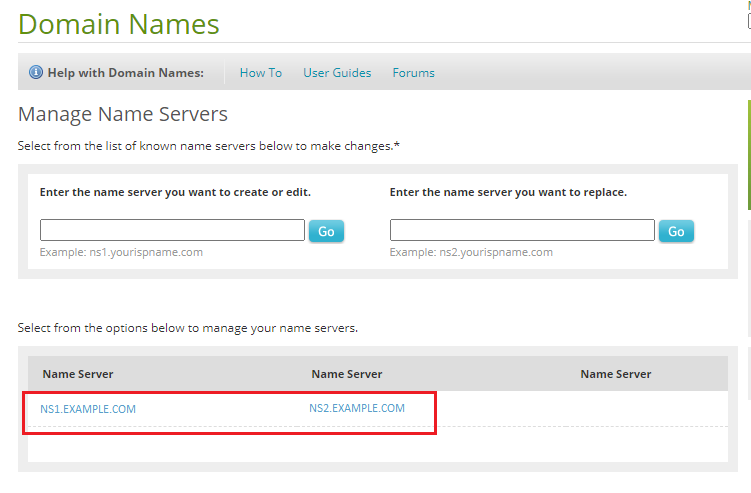
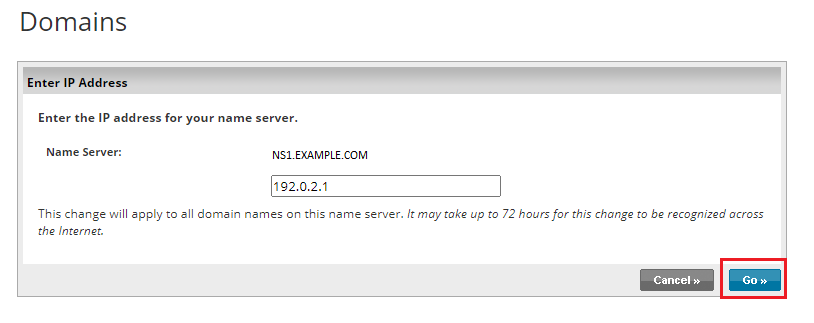
- Click
ns1.<your-domain>, enter your server IP, click Go, then Save Changes. Repeat forns2.
IONOS
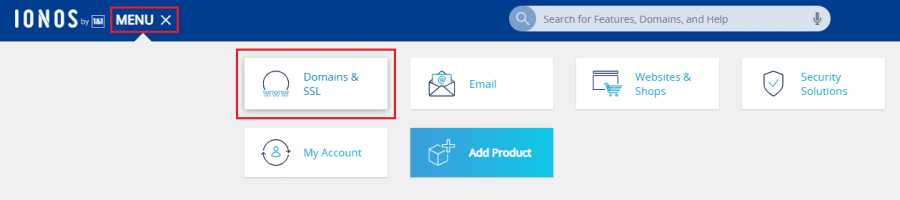
- Log in to IONOS and go to Menu → Domains & SSL.
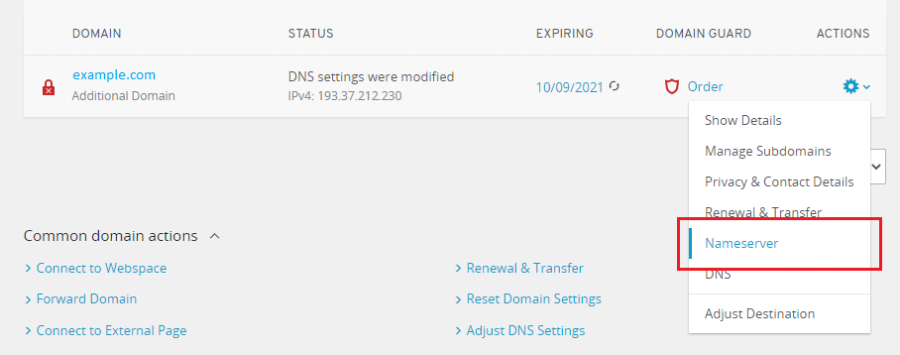
- Next to your domain, open the actions icon and click Nameserver.
- Click Use custom name servers.
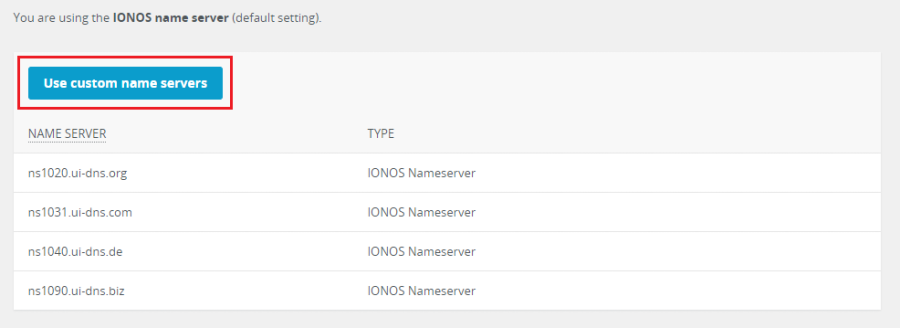
- Enter
ns1.<your-domain>andns2.<your-domain>with your server IP (the IP fields appear once you enter the nameservers), then Save.
That's it! Your website goes live once the change propagates — this can take anywhere up to 24–72 hours depending on the registrar.
