Configuring VPN in Microsoft Windows is simple with just few steps to apply as following:
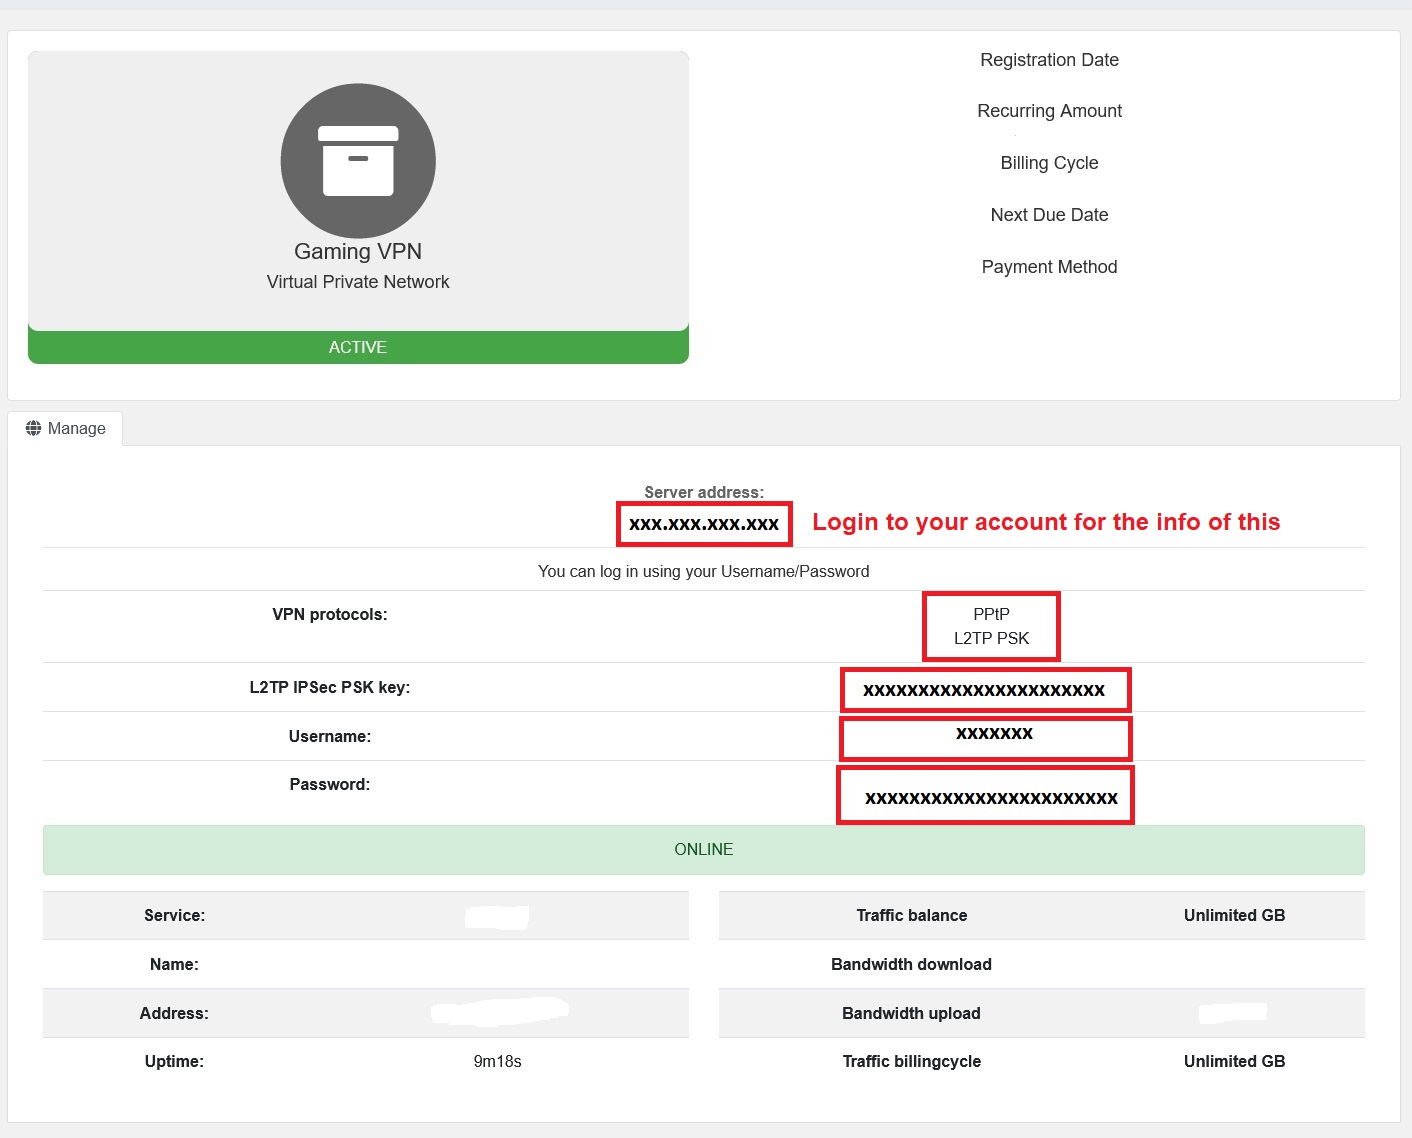
1- Login to your account in our website and navigate to your VPN Service to view its credentials such as (Username, Password and PSK key in case you want to use L2TP PSK protocol)
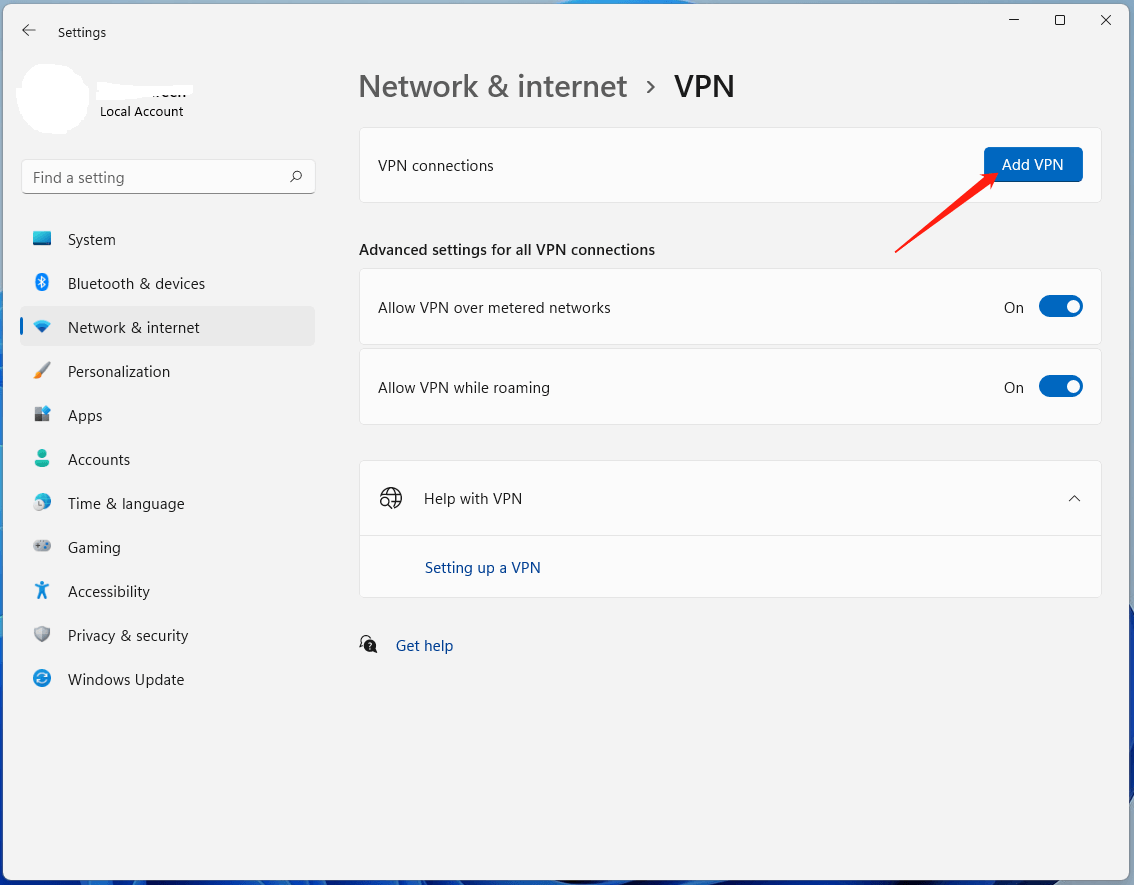
2- In Windows Navigate to Start > Settings > Network & internet > VPN
3- Click the Add VPN button behind the VPN connections.
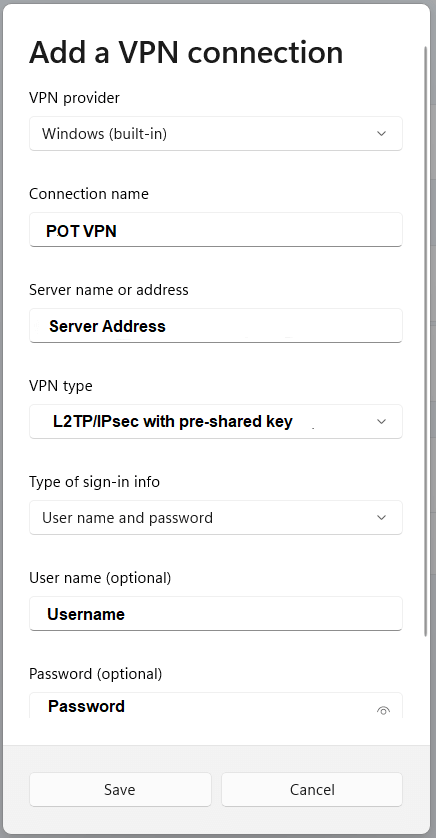
4- Enter your connection settings as below.
Explanation:
For VPN provider, select Windows (built-in)
For Connection name, name your VPN Connection (Ex. POT VPN).
For Server name or address enter your server address (Server Address provided in Step 1)
For VPN type select Automatic or (Supported protocols: Point to Point Tunneling Protocol (PPTP) or L2TP/IPsec with pre-shared key)
For Type of sign-in info select User name and password
For User name, enter your POT VPN username (Username is provided in Step 1)
For Password, enter your POT VPN password (Password is provided in Step 1)
Click Save
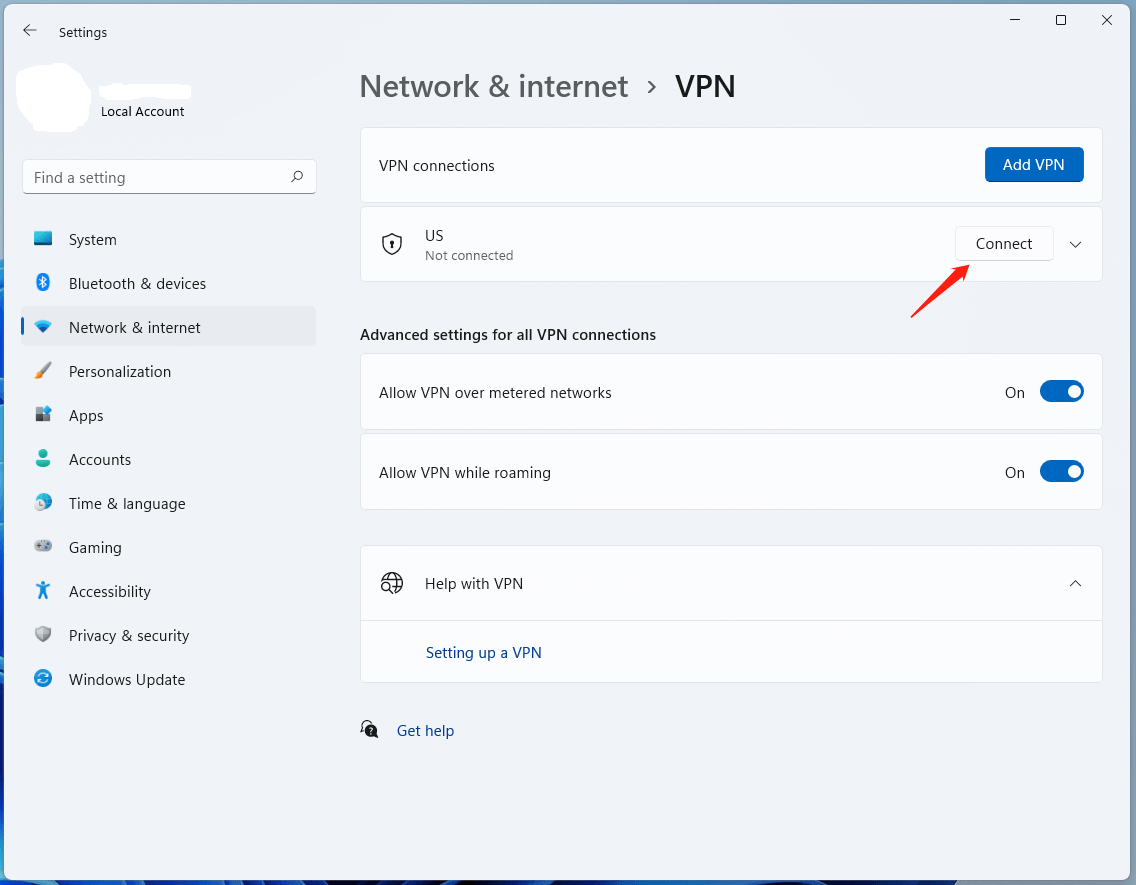
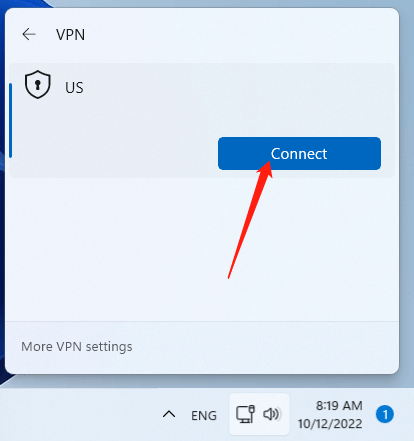
5- After you have successfully added the VPN, you can find that it is listed under the VPN connections in the Network and internet settings. You can click the Connect button to connect your computer to this VPN.
You can click on the network icon on the taskbar, select VPN in the pop, click on the target VPN, and select Connect.
Note:
- We recommend to use L2TP protocol due to its level of encryption.
- Our VPN is designed for low latency purpose, keeping the VPN ON all the time wont be beneficial and its not recommended. Once your done using it, Disconnect and remain with your internet usage as usual.
- Your VPN setup is completed at this step but we highly recommend that you confirm that the VPN is connected to our network correctly by applying the following steps:
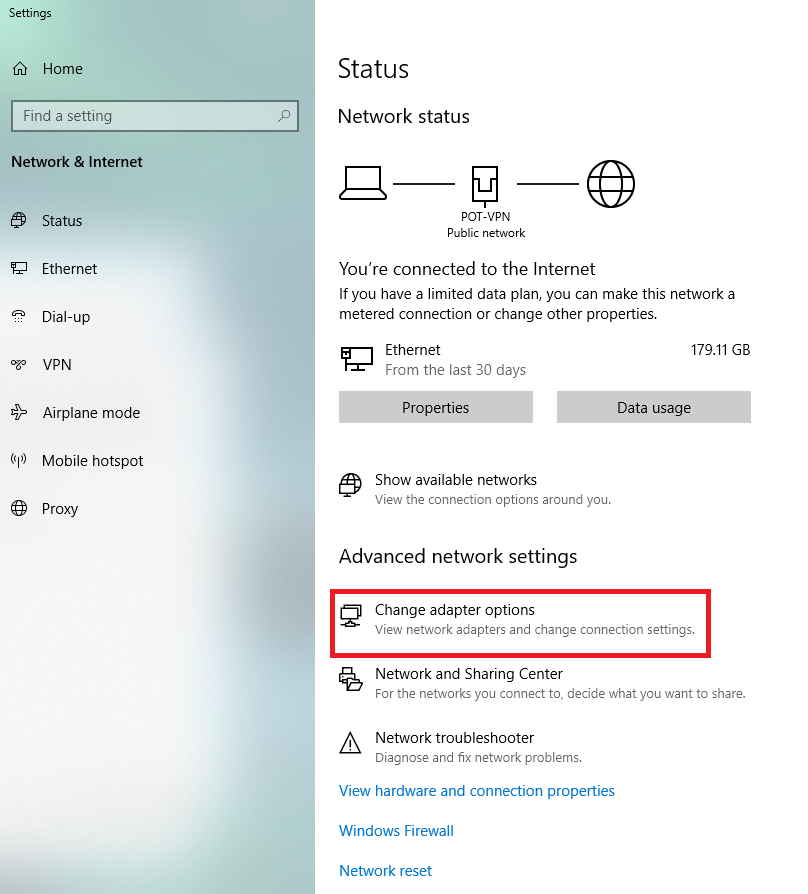
(Optional) Confirm that VPN is connected to our network correctly:
- Back to windows VPN and click on "Change Adapter Options"
- On POT-VPN or the name of the vpn you created, right click and select "Properties"
- Click on "Networking" tab then select "Internet Protocol Version 4 (TCP/IPv4)" and click "Properties"
- Make sure that in IP Settings tab "Use default gateway on remote network" is TICKED
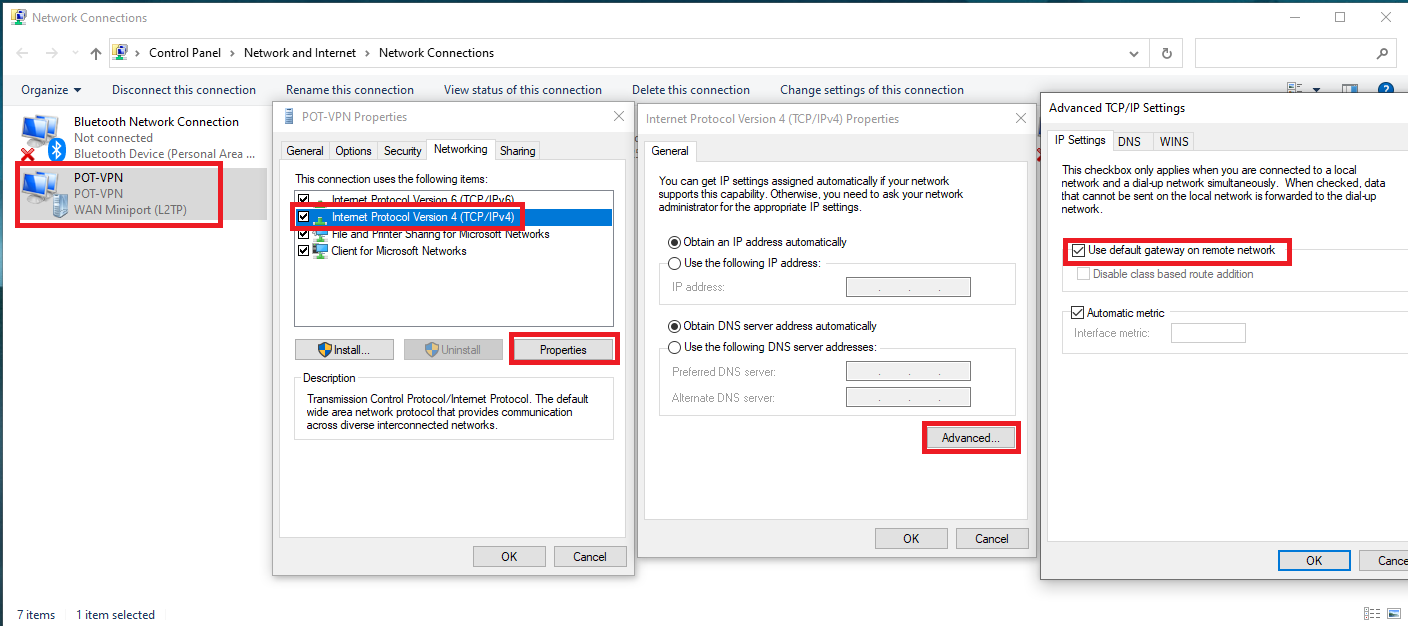
- Click Ok and your good to go
Now your traffic routes will be managed by our network for best practice
