Requirements:
- Domain from registrar
- DNS / NS info from us (Will be received via email or when you log in to your account once you purchase a web hosting service from us)
Description:
You bought a domain name from a company (which is called a domain name registrar or shortly a registrar). You created a website in Plesk and filled it with content. Now you want to bring your website online. In other words: connect your domain name with your website running on Plesk. This topic will explain to you how to do so.
Getting your website up and running comes down to choosing your DNS configuration and then configuring DNS. Both tasks may seem intimidating at first. We will help you by describing configuration types and step-by-step procedures of configuring DNS.
You can choose from the following DNS configurations:
-
(Recommended) Using Plesk as the primary DNS Server.
If you go with this configuration, Plesk will create and manage your website DNS records automatically.
We will show you how to switch from the DNS services of the following registrars to Plesk:
- - Hover (Enom)
- - GoDaddy
- - NameCheap
- - Network Solutions
- - IONOS
Using Plesk as the Primary DNS Server
To put your website online, you can use Plesk as the primary DNS service.
This DNS configuration is easy to set up. After you do so, Plesk will manage your website DNS records automatically.
The general procedure of setting up Plesk as the primary DNS server looks as follows:
-
Log in to the DNS service portal of your domain registrar.
-
Add the glue records for the nameservers. The glue records have the following pattern:
ns1.<domain_name>   <the Plesk server IP address>
ns2.<domain_name>   <the Plesk server IP address>
For example:
ns1.example.com 192.0.2.1 ns2.example.com 192.0.2.1 -
Change the nameservers of the domain registrar to those you added during the previous step (
ns1.<domain_name>andns2.<domain_name>).
We will now show you the exact procedures for the most popular top registrars.
Hover (Enom)
-
Log in to Plesk.
-
Go to Websites & Domains > your domain > the “Hosting & DNS” tab > DNS Settings.
-
Locate two glue records. They have the following pattern:
ns1.<domain_name>   <the Plesk server IP address>
ns2.<domain_name>   <the Plesk server IP address>
Copy the NS records’ hostnames (
ns1.<domain_name>andns2.<domain_name>) and the server IP address. You will need them later.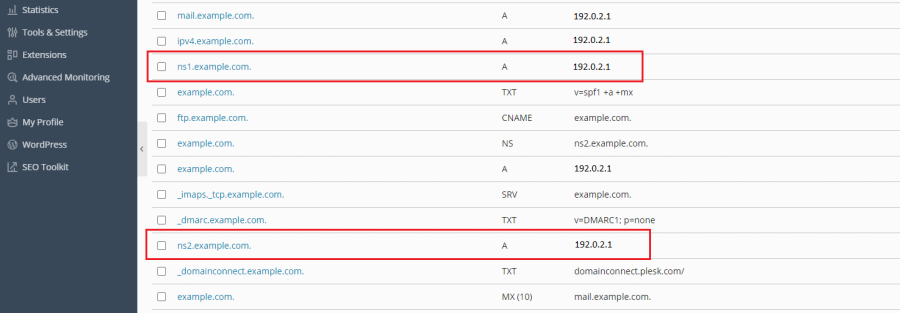
-
Make sure you are on the page of the domain for which you want to configure DNS hosting in Plesk.
-
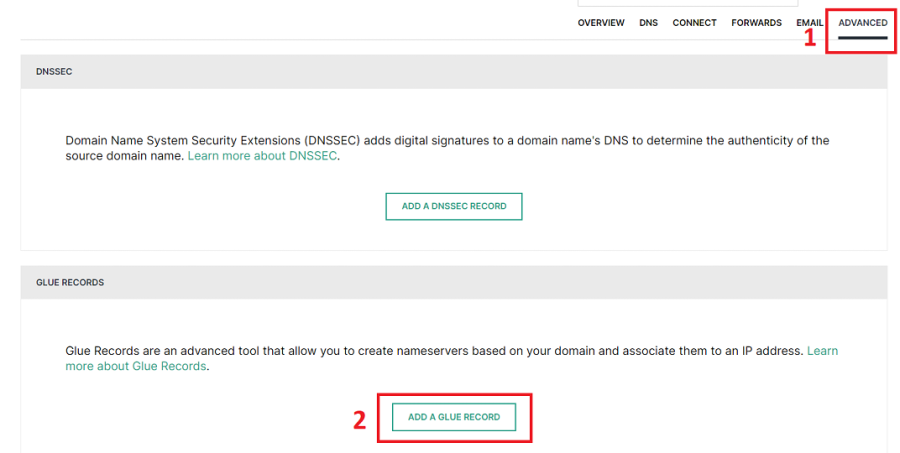
Go to the “Advanced” tab and then click ADD A GLUE RECORD.
-
Add the first glue record. To do so, specify
ns1.<domain_name>, your Plesk IP address, and then click ADD RECORD.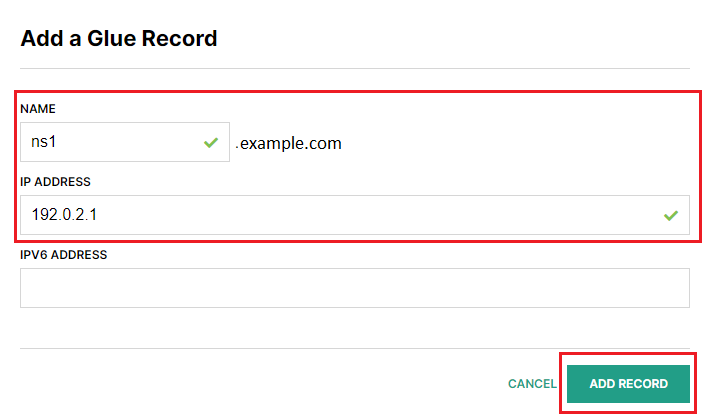
-
Add the second glue record. To do so, repeat the previous step but specify
ns2.<domain_name>. -
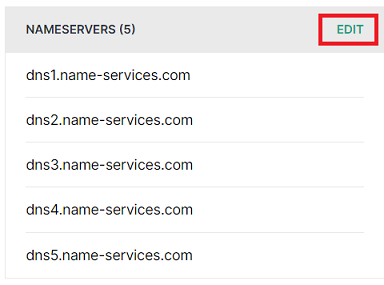
Go to the “Overview” tab, scroll down to the “NAMESERVERS” section on the left, and then click EDIT next to it.
-
Delete three nameservers and keep only the first two. As “NAMESERVER 1” and “NAMESERVER 2”, specify the nameservers you have created earlier (
ns1.<domain_name>andns2.<domain_name>), and then click SAVE NAMESERVERS.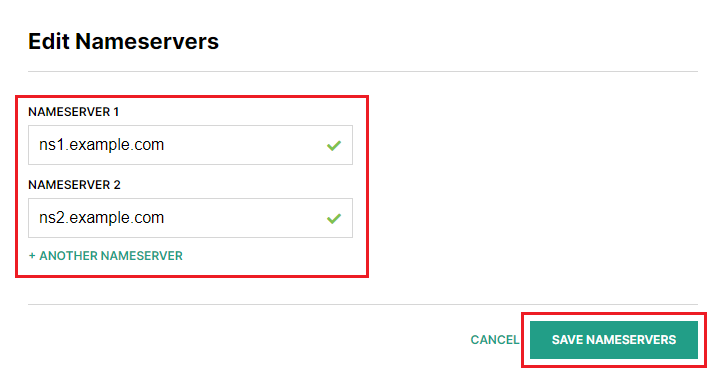
You have finished configuring Plesk as the primary DNS server. Your website will be up and running once changes come into effect. Propagation can take up to 24 hours.
GoDaddy
-
Log in to Plesk.
-
Go to Websites & Domains > your domain > the “Hosting & DNS” tab > DNS Settings.
-
Locate two glue records. They have the following pattern:
ns1.<domain_name>   <the Plesk server IP address>
ns2.<domain_name>   <the Plesk server IP address>
Copy the NS records’ hostnames (
ns1.<domain_name>andns2.<domain_name>) and the server IP address. You will need them later.
-
Log in to GoDaddy Domain Manager.
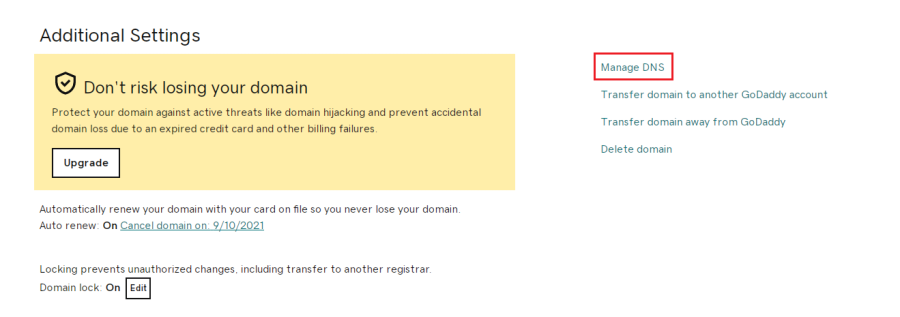
-
Click the domain name, scroll down to the “Additional Settings” section, and then click “Manage DNS” on the right.
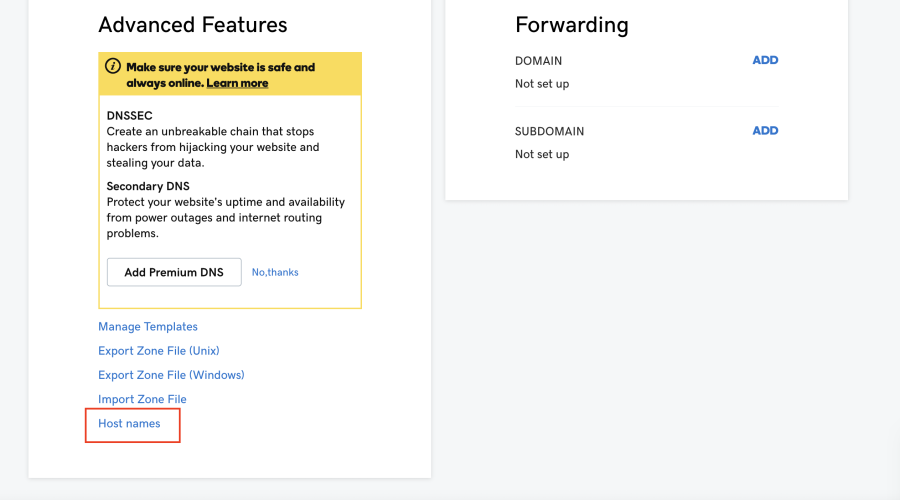
-
Scroll down to the “Advanced Features” section, click “Host names”, and then click ADD.
-
Add two glue records. To do so, specify
ns1.<domain_name>,ns2.<domain_name>, your Plesk IP address, and then click Save.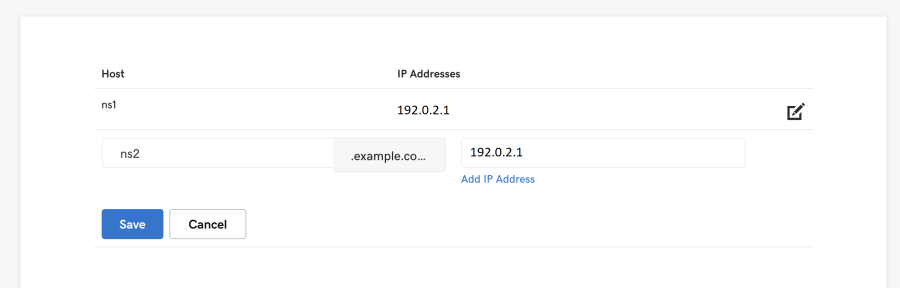
-
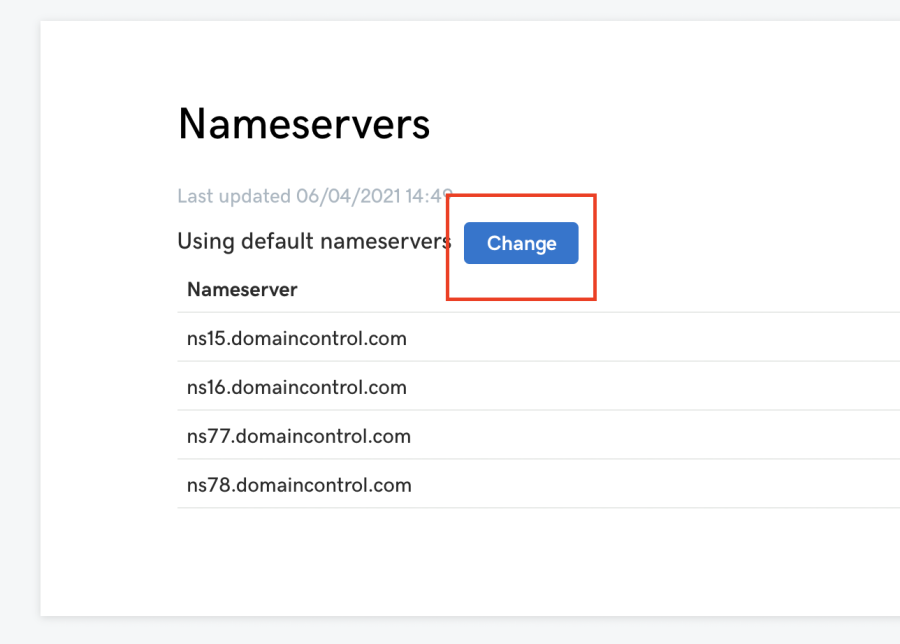
Next to “Nameservers”, click Change.
-
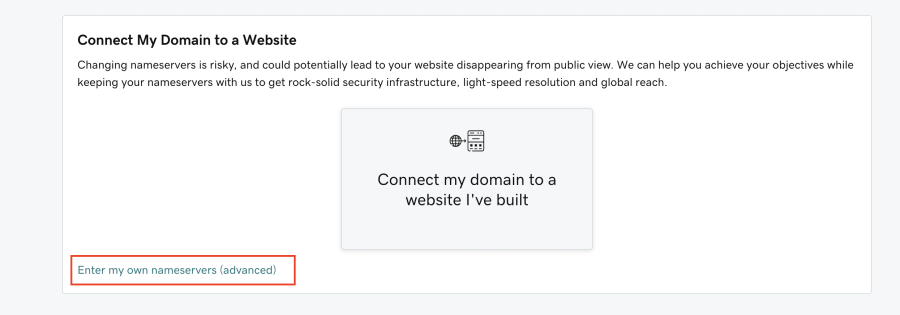
Click “Enter my own nameservers (advanced)”.
-
Specify the nameservers you have created earlier (
ns1.<domain_name>andns2.<domain_name>) and then click Save.
-
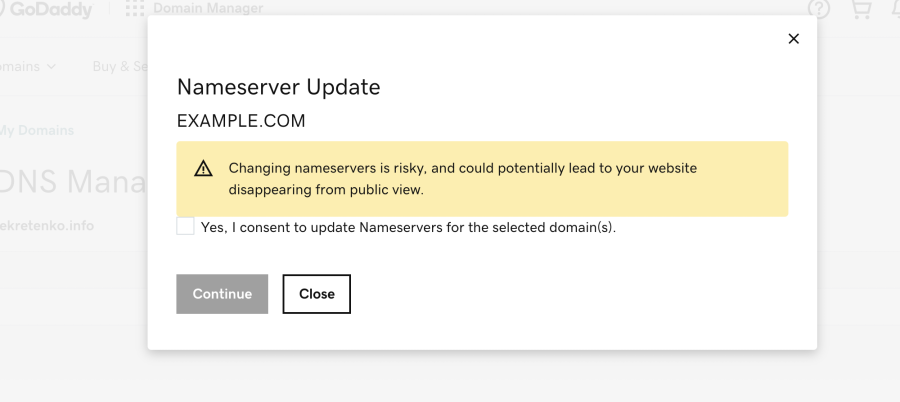
Select “Yes, I consent to update Nameservers for the selected domain(s)” and click Continue.
You have finished configuring Plesk as the primary DNS server. Your website will be up and running once changes come into effect. Propagation can take up to 24 hours.
NameCheap
-
Log in to Plesk.
-
Go to Websites & Domains > your domain > the “Hosting & DNS” tab > DNS Settings.
-
Locate two glue records. They have the following pattern:
ns1.<domain_name>   <the Plesk server IP address>
ns2.<domain_name>   <the Plesk server IP address>
Copy the NS records’ hostnames (
ns1.<domain_name>andns2.<domain_name>) and the server IP address. You will need them later.
-
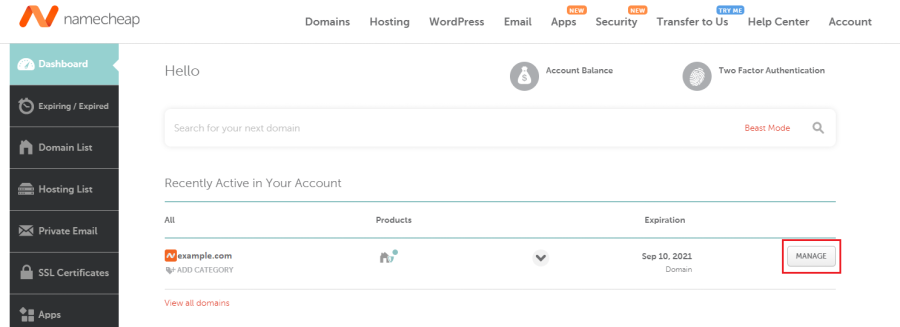
On the row corresponding to the domain, click MANAGE.
-
Go to the “Advanced DNS” tab and scroll down to the “PERSONAL DNS SERVER” section.
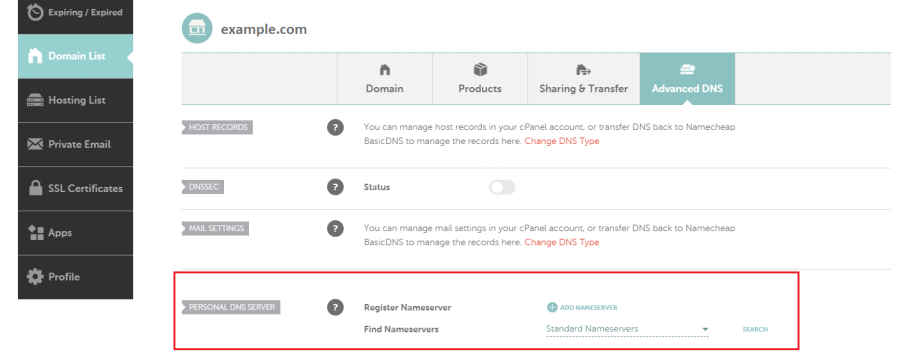
-
Add the first glue record. To do so, click ADD NAMESERVER. Under the “Nameserver” drop-down list, select
ns1, specify the Plesk IP address, and then click DONE.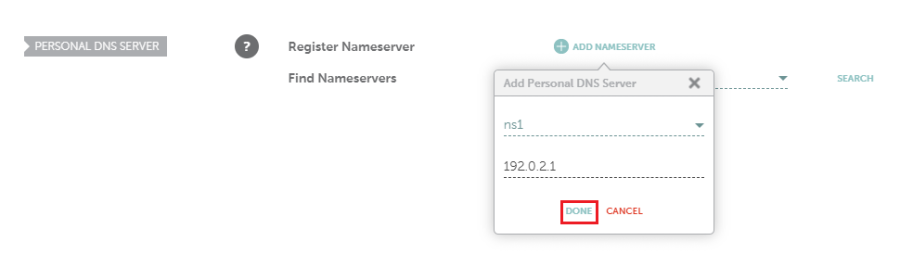
-
Add the second glue record. To do so, repeat the previous step but select
ns2.Note: The added glue records do not appear on the screen right away. To see them, in the “PERSONAL DNS SERVER” section, click SEARCH.

-
Go to the “Domain” tab.
-
In the “NAMESERVERS” section, select “Custom DNS”, specify the nameservers you have created earlier (
ns1.<domain_name>andns2.<domain_name>), and then click to save changes.
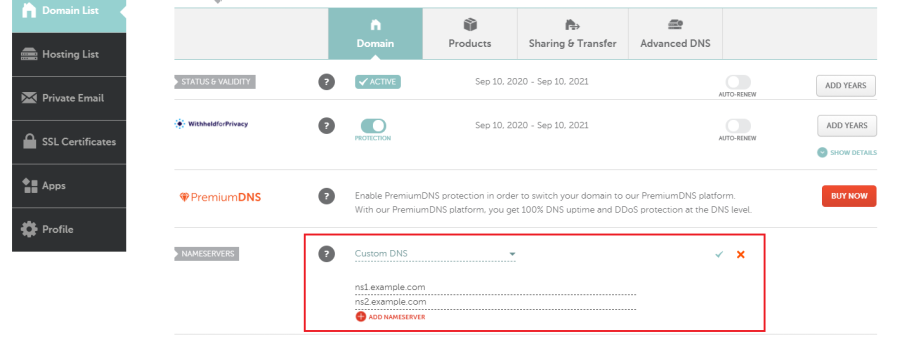
You have finished configuring Plesk as the primary DNS server. Your website will be up and running once changes come into effect. Propagation can take up to 24 hours.
Network Solutions
-
Log in to Plesk.
-
Go to Websites & Domains > your domain > the “Hosting & DNS” tab > DNS Settings.
-
Locate two glue records. They have the following pattern:
ns1.<domain_name>   <the Plesk server IP address>
ns2.<domain_name>   <the Plesk server IP address>
Copy the NS records’ hostnames (
ns1.<domain_name>andns2.<domain_name>) and the server IP address. You will need them later.
-
Click “My Domain Names”.
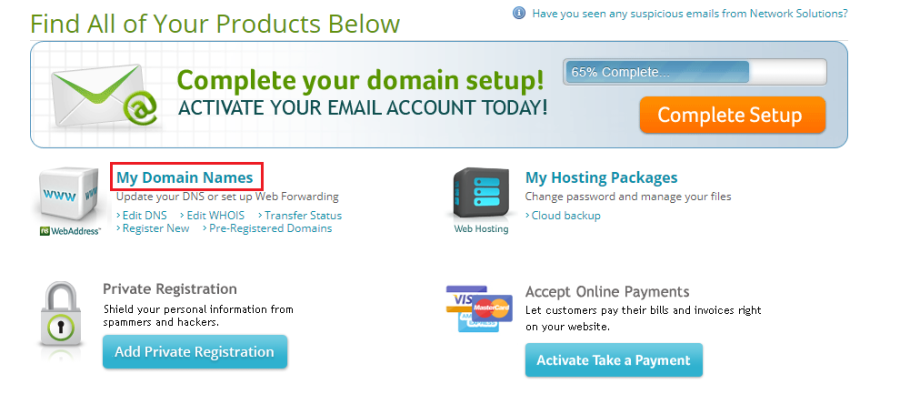
-
Under your domain, scroll down to the “Advanced Tools” section and click its name to unfold the section.

-
Next to “Nameservers (DNS)”, click “MANAGE”.
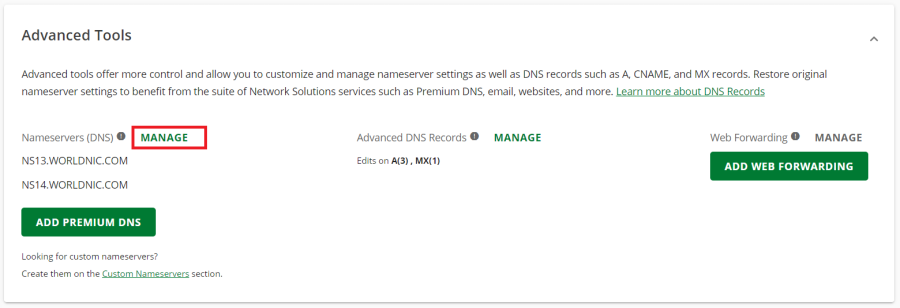
-
Add two nameservers
ns1.<domain_name>andns2.<domain_name>and then click SAVE.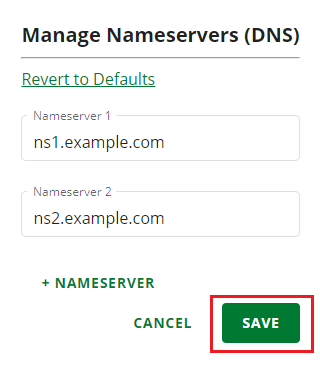
-
At the bottom of the “Advanced Tools” section, click “Custom Nameservers”.
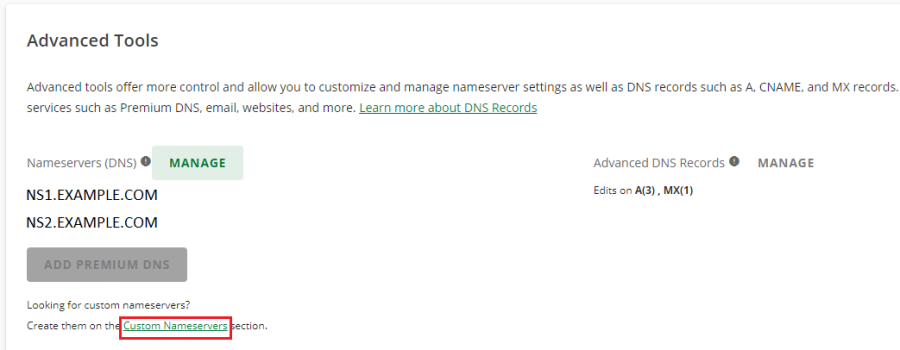
-
Locate the two nameservers you have added earlier.
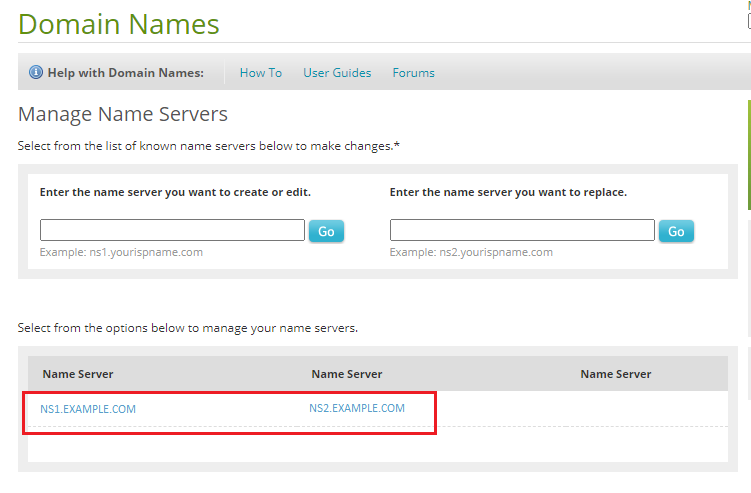
-
Click the first nameserver (
ns1.<domain_name>), specify the Plesk server IP address, click Go, and then click Save Changes.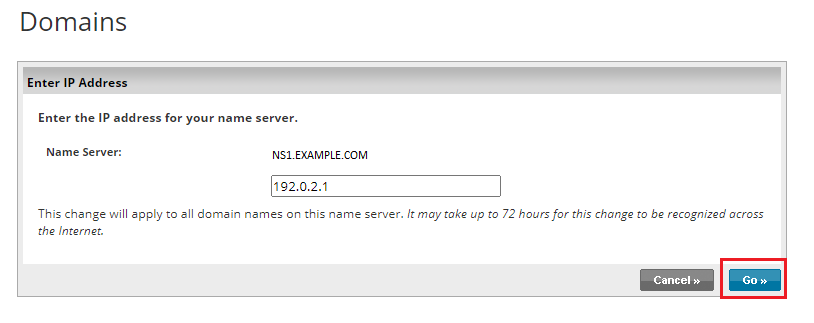
-
Repeat the previous step for the second nameserver
ns2.<domain_name>.
You have finished configuring Plesk as the primary DNS server. Your website will be up and running once changes come into effect. Propagation can take up to 72 hours.
IONOS
-
Log in to Plesk.
-
Go to Websites & Domains > your domain > the “Hosting & DNS” tab > DNS Settings.
-
Locate two glue records. They have the following pattern:
ns1.<domain_name>   <the Plesk server IP address>
ns2.<domain_name>   <the Plesk server IP address>
Copy the NS records’ hostnames (
ns1.<domain_name>andns2.<domain_name>) and the server IP address. You will need them later.
-
At the top, click MENU > Domains & SSL.

-
Next to your domain, click the
 icon and then click Nameserver.
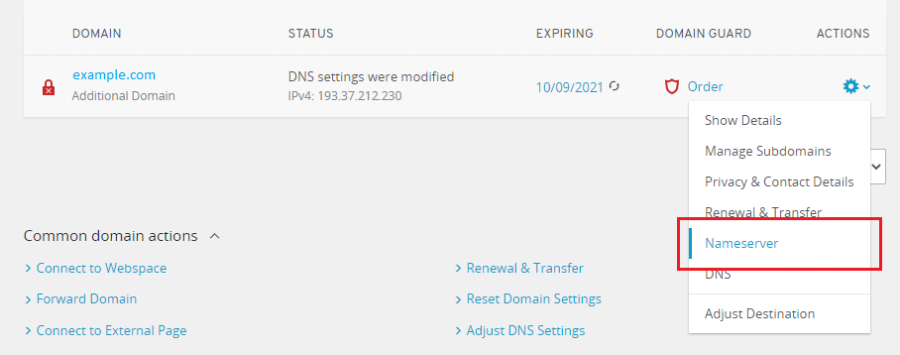
-
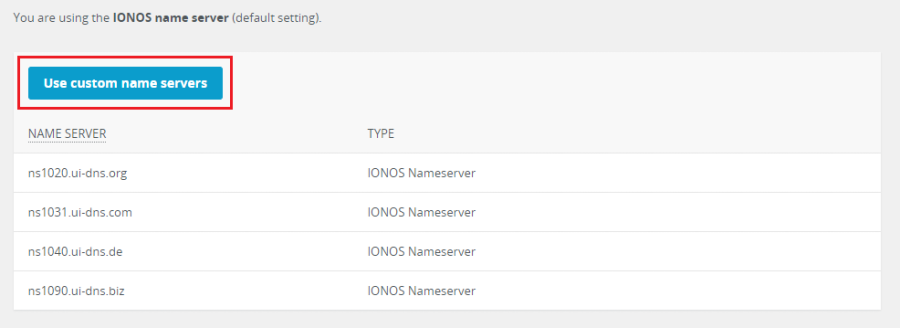
Click Use custom name servers.
-
Specify two nameservers (
ns1.<domain_name>andns2.<domain_name>), the Plesk IP address, and then click Save. The fields for IP addresses will appear once you specify the nameservers.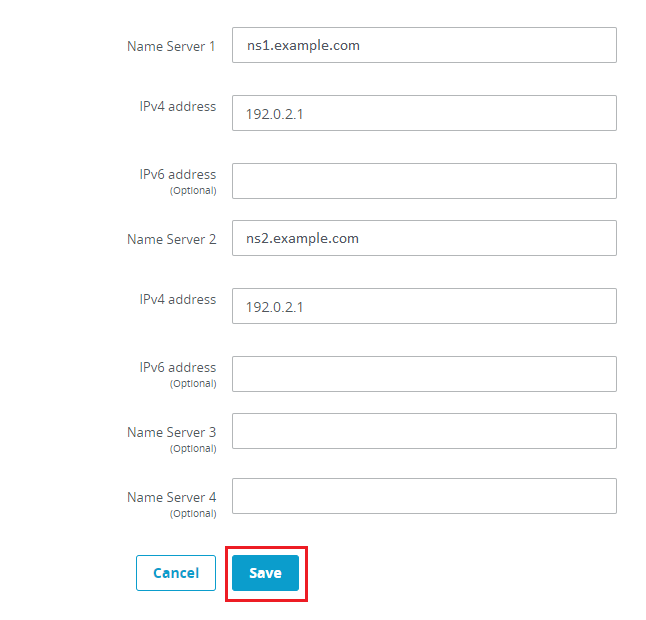
You have finished configuring Plesk as the primary DNS server. Your website will be up and running once changes come into effect. Propagation can take up to 48 hours.
